Of course, it could have been just a button...
At some point. I decided to add a self destruct system. This was going to be a simple keyswitch... but then as usual, I got carried away.
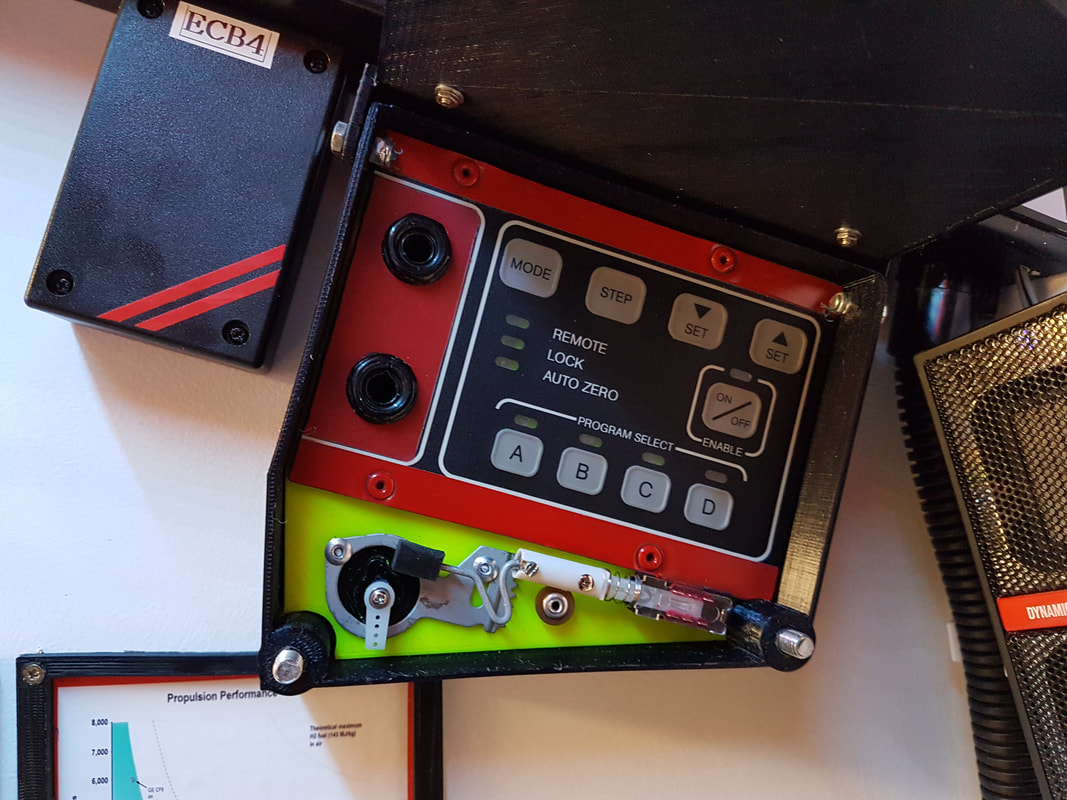
So, I rustled through my box of scrap and found a small panel that came off of some machine many years back. It had some interesting buttons, and so it began.
I masked off and painted red the text that was not relevant to a destruct system. Quick bit of testing with a multimeter soon revealed the ribbon cable connections to the front panel.
It is housed in a 3d printed enclosure in black and yellow. Installed are a couple of old 3.5mm jack sockets and a slide button off a very old radio.
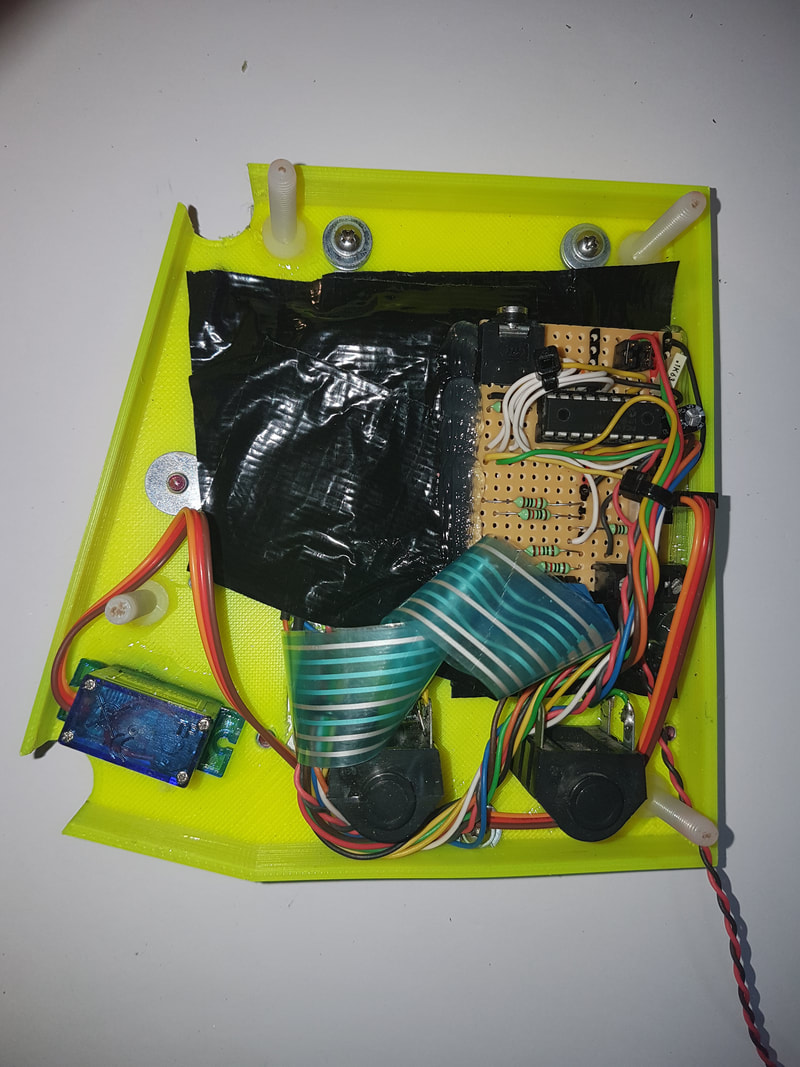
This button is operated by a cheap servo and cam arrangement.
Inside the panel is a Picaxe 18m2 IC. This simply takes the inputs from the buttons, and outputs to the servo and the leds I added.
You have to plug the 2x stainless 3.5mm jacks into the unit (they have press buttons on the end of them). This powers up the unit.
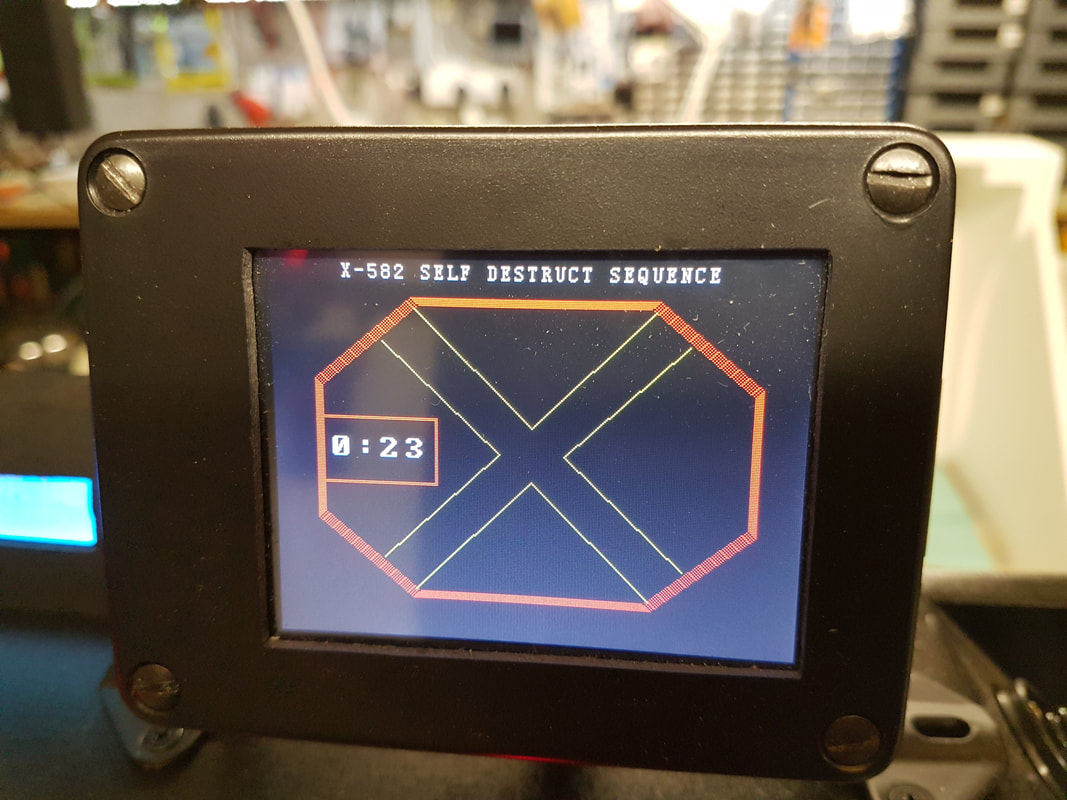
Then, you follow a complicated sequence of button presses until the system arms (when the servo turns).
This tells the ship to start the countdown, and initialises the TFT screen graphics. This is a nod to the Nostromo self destruct sequence from the film Alien.
You can disarm the system by following a slightly shorter disarm procedure, but this must be before the cut-off time as expired.
So, I rustled through my box of scrap and found a small panel that came off of some machine many years back. It had some interesting buttons, and so it began.
I masked off and painted red the text that was not relevant to a destruct system. Quick bit of testing with a multimeter soon revealed the ribbon cable connections to the front panel.
It is housed in a 3d printed enclosure in black and yellow. Installed are a couple of old 3.5mm jack sockets and a slide button off a very old radio.
This button is operated by a cheap servo and cam arrangement.
Inside the panel is a Picaxe 18m2 IC. This simply takes the inputs from the buttons, and outputs to the servo and the leds I added.
You have to plug the 2x stainless 3.5mm jacks into the unit (they have press buttons on the end of them). This powers up the unit.
Then, you follow a complicated sequence of button presses until the system arms (when the servo turns).
This tells the ship to start the countdown, and initialises the TFT screen graphics. This is a nod to the Nostromo self destruct sequence from the film Alien.
You can disarm the system by following a slightly shorter disarm procedure, but this must be before the cut-off time as expired.
|
|

|
|
So, the remaining job is to now produce some kind of instruction panel like the one at the bottom of this page.
