OK. Where the heck do I start.
It quickly became apparent that all this 'stuff' wasn't going to fit inside my 4" wide panels. However, I think it all spilling out into smaller modules and boxes has actually made the cockpit a much more interesting place.
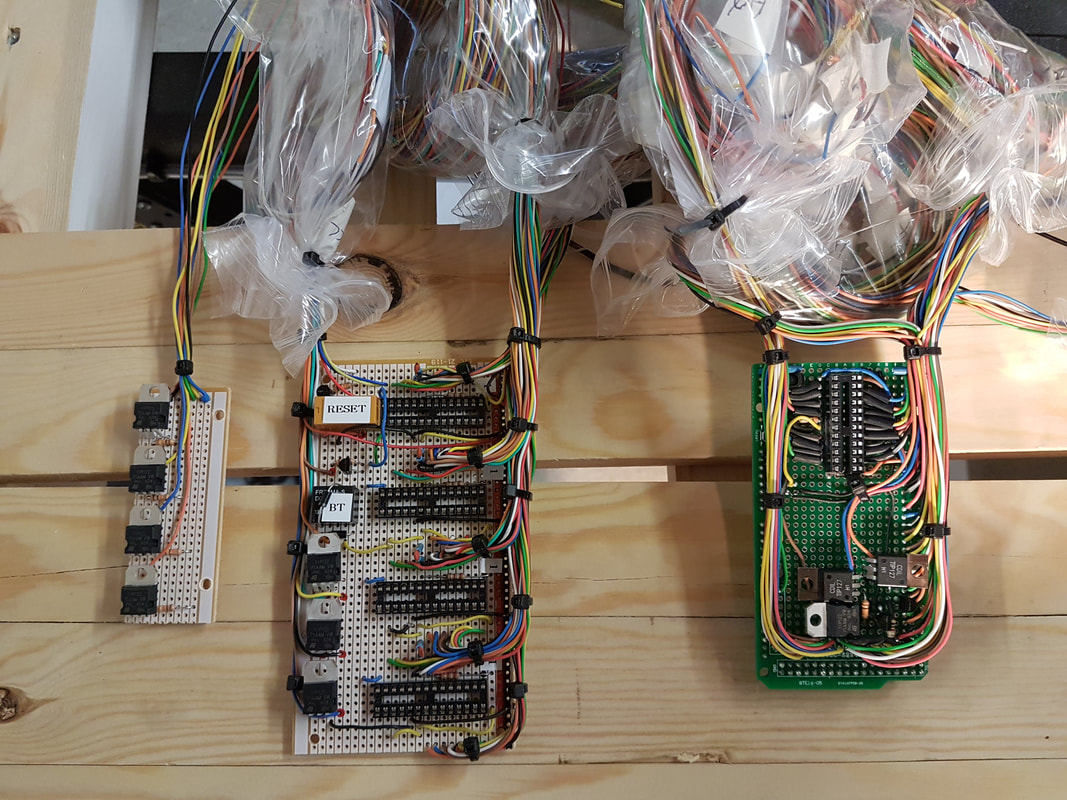
First job was wiring the buttons and illuminated switches. This in itself was a nightmare and trying to keep the wiring neat was a challenge.
I made several pcb's with the multiplexers, transistors etc for the interfacing between the Arduino 2560p and the outside world.
Then began the wiring. It took quick a few evenings. I spent many an hour camped in the Starship's cockpit in my garage, mid winter with the heater going.
It doesn't seem to matter how hard you try, it still looks a wiring mess. However, I was very good and labelled every cable.
|

|

|
After suffering with various false triggering issues, I has to revisit the wiring and add some ferrite coils on some of the communications lines. Not surprised really that they suffered a little interference.
The Bluetooth module was moved to its own enclosure. This helped greatly, as these modules are very electrically noisy.
I also had quite a lot of troubleshooting to overcome problems. I originally started with an Arduino Mega breakout board that I soldered directly to.
However, later on I binned that board and simply put pins on the ends of the cables with labels. These plug directly into the Arduino Mega now. This makes alterations or troubleshooting so much easier, as you can simply pull out the line required.
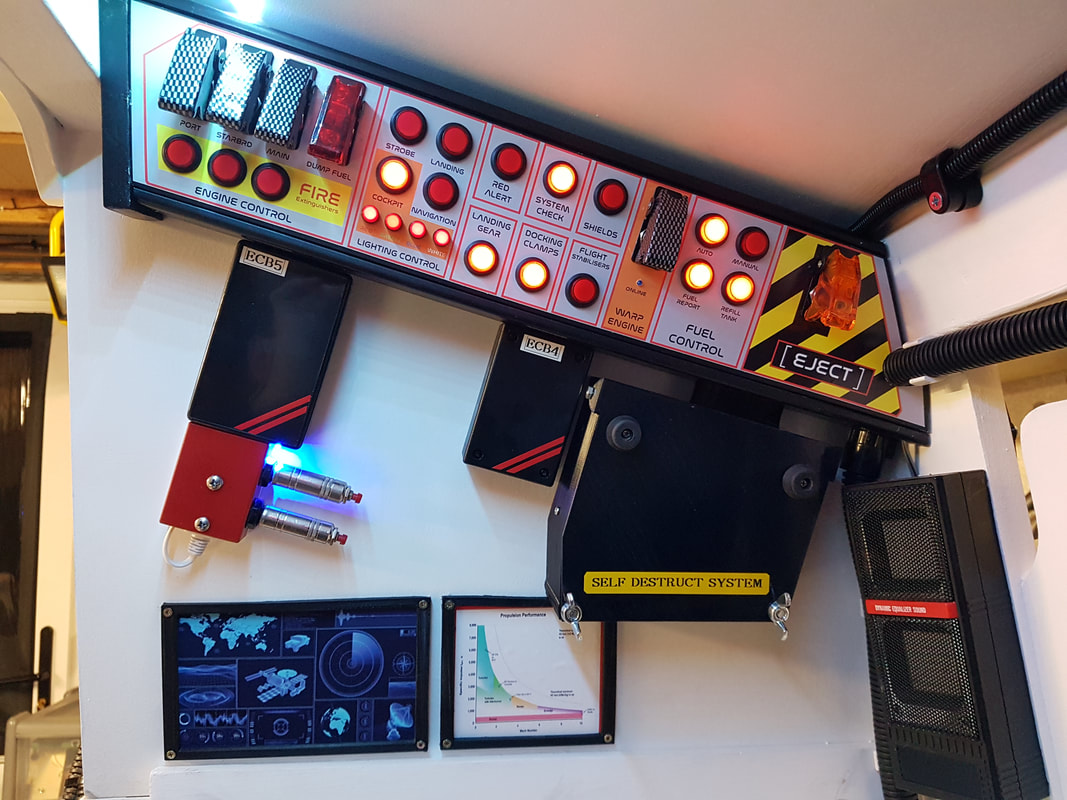
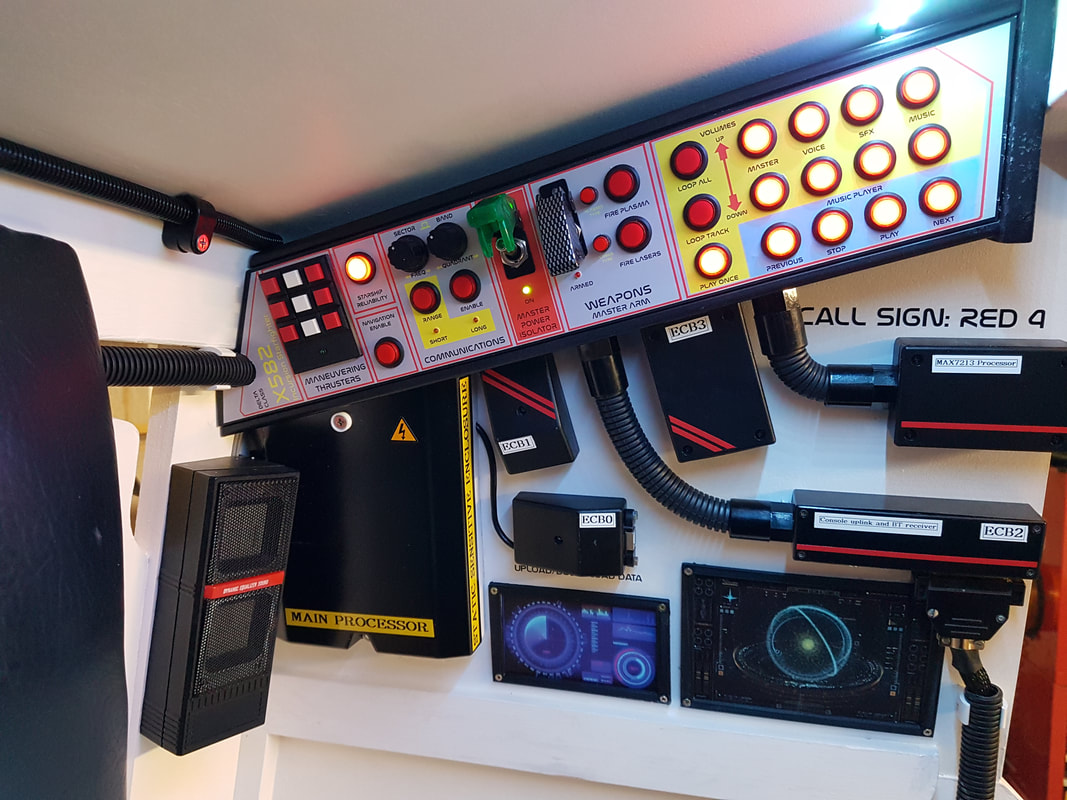
Each boxes is labelled and has a function of some sort.
ECB0 houses the USB programming port for the Arduino.
ECB1 has the reset button underneath it (resets the entire Starship - all Arduino's).
ECB2 is the Bluetooth receiver and connection to the joystick panel.
ECB3 has a slide switch underneath that switches the ship into demonstration mode.
ECB4 is the connection of the self destruction system.
ECB5 houses the amplifier for the cockpit music speakers.
|
|
I then basically sat and ran through the entire system button by button and eliminated any mistakes or issues with the coding.
Silly items like illuminated buttons not operating when required, and also adding features that I thought of afterwards, such as preset RGB led colours for the cockpit lights, demonstration mode, or volume presets (instead of adjusting SFX, voice and music levels individually).
Silly items like illuminated buttons not operating when required, and also adding features that I thought of afterwards, such as preset RGB led colours for the cockpit lights, demonstration mode, or volume presets (instead of adjusting SFX, voice and music levels individually).