|
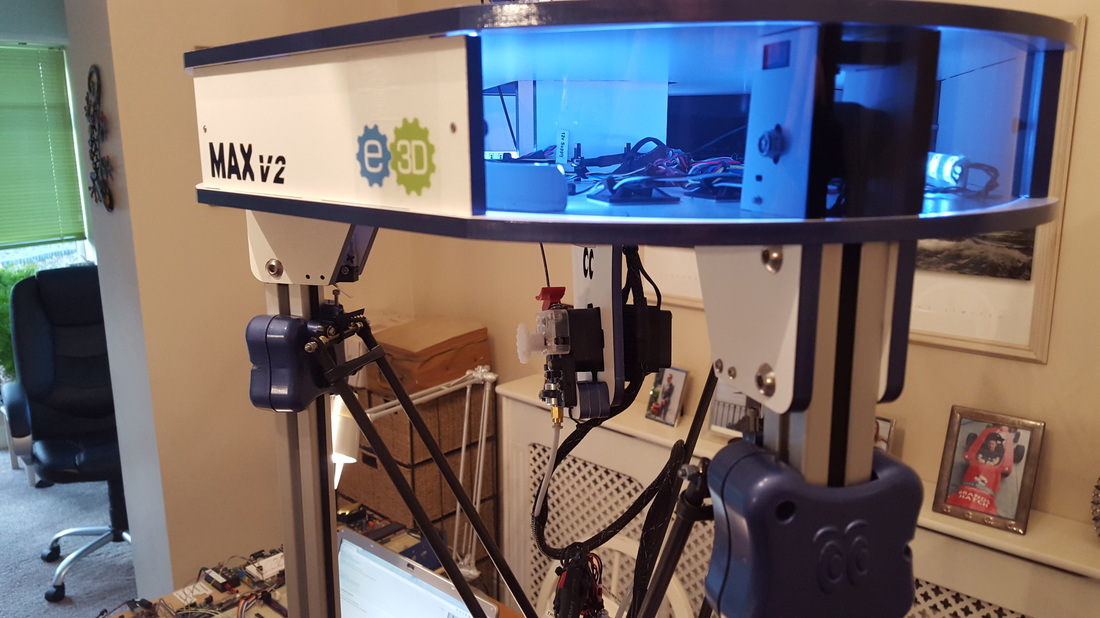
RoStock Max V2 3d Printer
Well it seemed like a good idea...
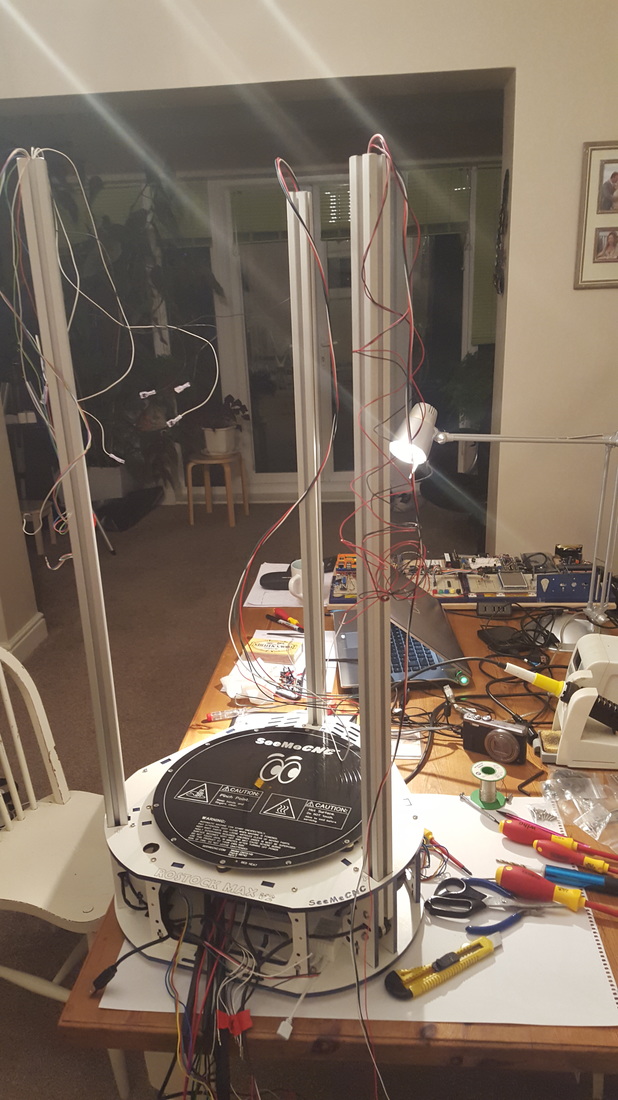
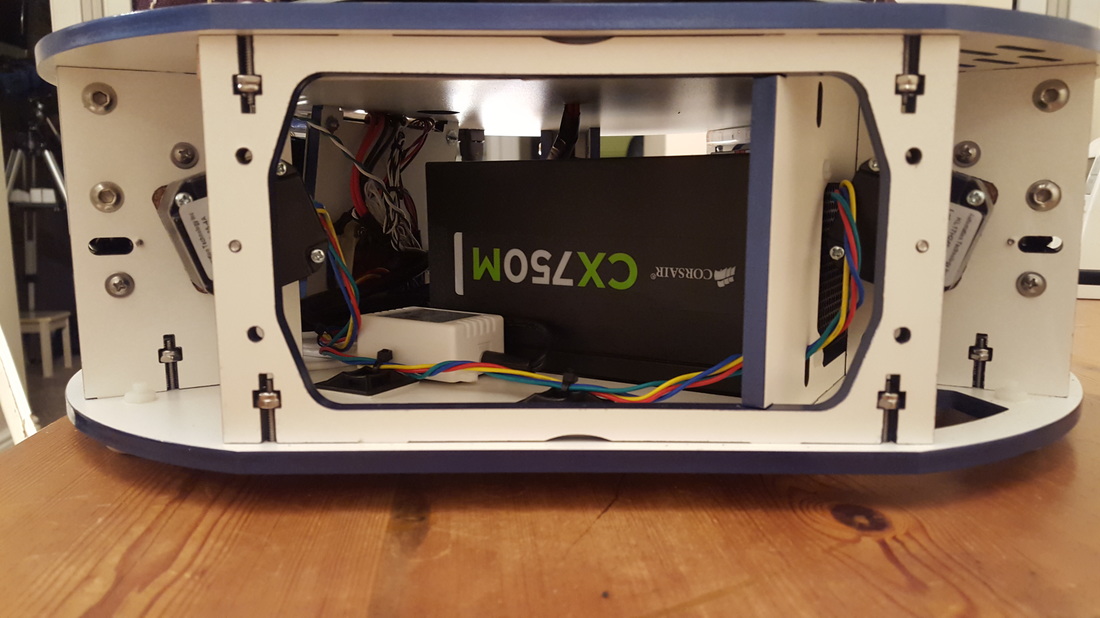
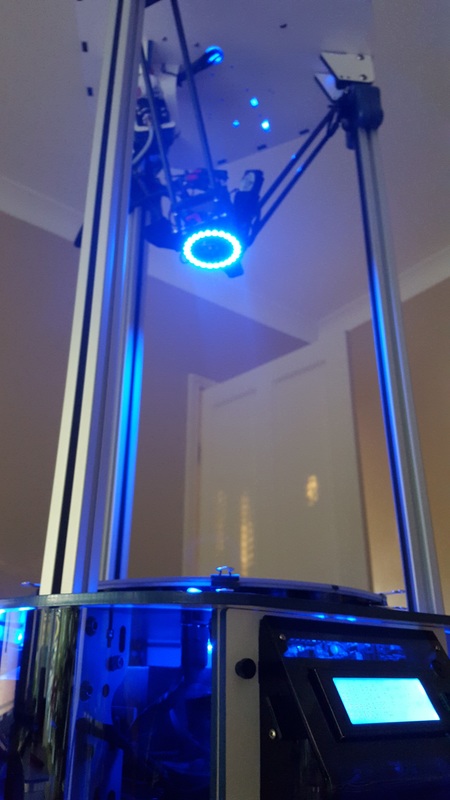
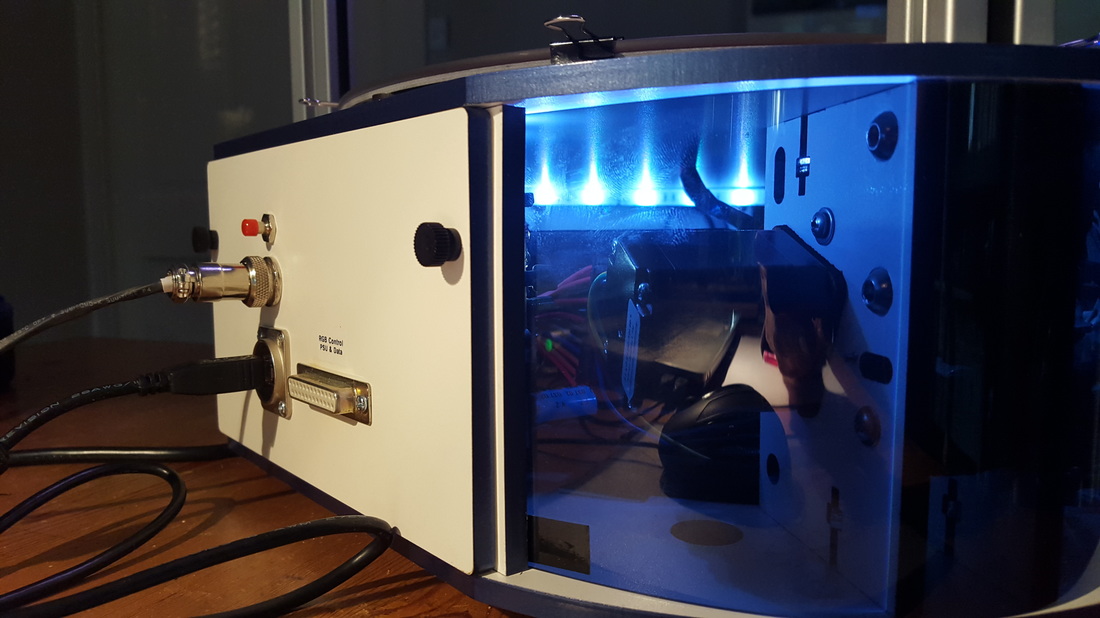
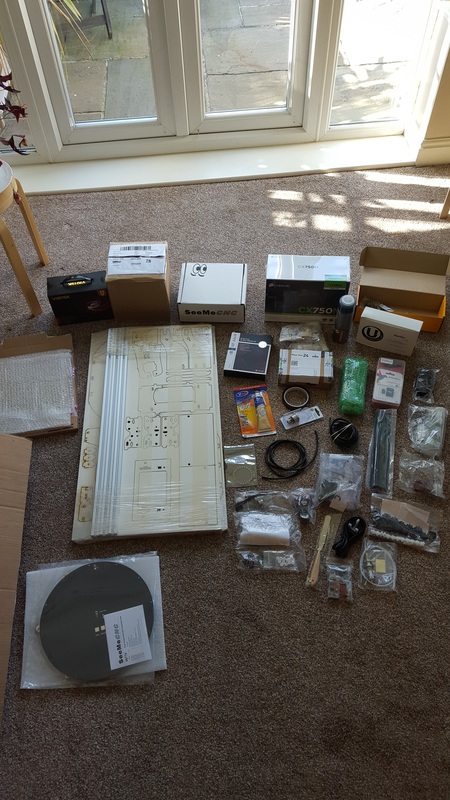
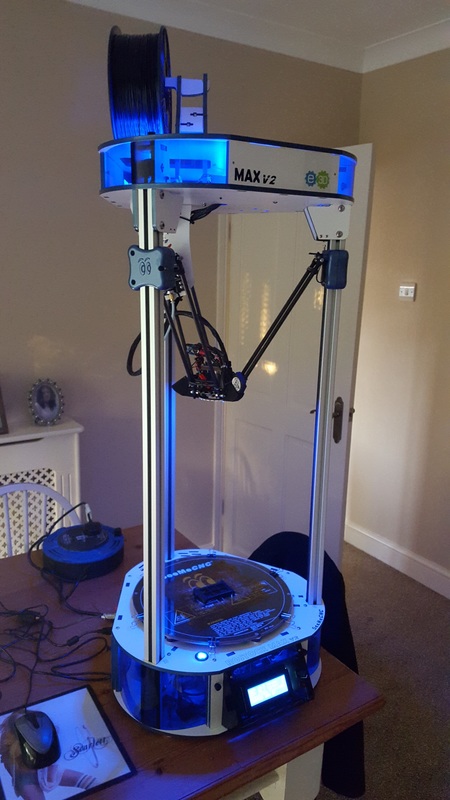
I purchased the Rostock Max V2 kit. The promise was a large print area 3d printer. As usual, I can't just 'build' it, I pimped it from the start. I made sure I assembled it as carefully as possible. Spent WAY more time than the instructions said, making sure everything was aligned and perfect. I added an RGB LED ring to the print head. This is controlled by an Arduino based circuit. I have the ability to change it to any colour, along with the RGB leds that I fitted into the chassis during building. There is a 25 way port on the side that also allows access to the RGB leds from a remote touch controller. Finally, the RGB leds are IR remote control as well. I upgraded the (crappy) computer PSU that came with it to a decent Corsair 750w affair. It was also modular, so I could tidy the wires much better. I also added a nice USB B port on the side for the computer connection, rather than a lead just sticking out the side. For cooling, I added an extra side mounted blue LED fan. This directs incoming air to the PSU module. |
|
|
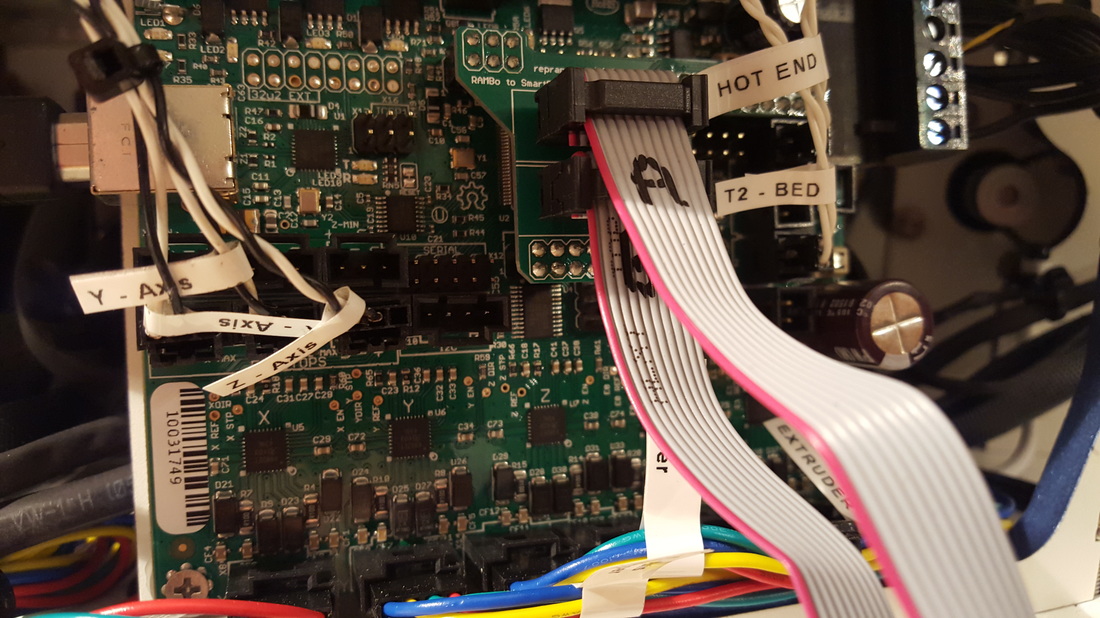
I also upgraded the cables that fed the heated build plate.
I had read in forums that the cables were undersized and suffered from heat problems. The kit isn't the greatest. The heat plate was slightly warped (apparently a known issue). This makes setting up the printer far more difficult. You have to program in that slight bow in the glass bed, so that it allows for it during the print. I built, but didn't fit the stock hotend. I instead fitted an E3D V6 hotend which apparently performed far better. Something to be honest, I am not sure is true. The clear plastic panels for the printer had holes cut through them (factory error). The UK supplier basically didn't seem to care about that. I had to fix the issue myself.
I also spent a lot of time priming, painting and lacquering the edges and trim parts of the printer. That went through a lot of spray paint.
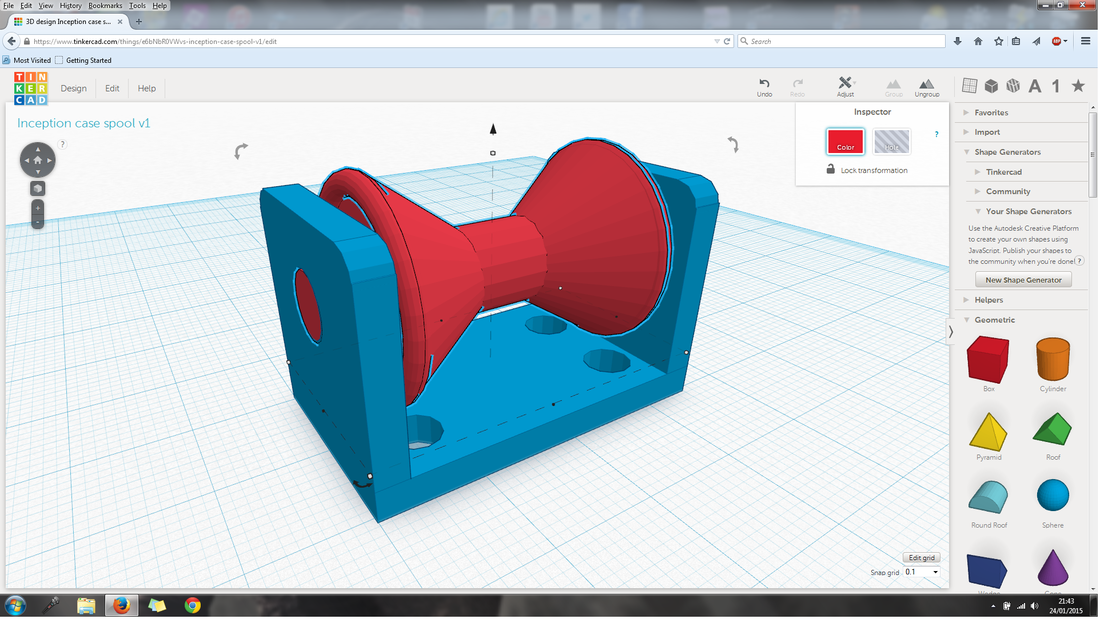
Looks far better however than the stock cut edges. My first prints were a set of 3x cooling fans for the hotend. I designed the fan ducts in some great free 3d software called Tinkercad. Took a few attempts, but the fans fitted nicely. Only trouble with Tinkercad is that it doesn't make nice rounded curves in the designs. It tends to make curves using a series of flats. However, for quick basic design, I think its great. I also designed and printed a cooling fan for the extruder stepper motor. Something else that apparently gets hot. |
Setting up and printing
I print using 1.75mm filament. You can print with 3mm if you change the hotend and extruder.
For those that want to know, the hotend is the part that melts the filament as it moves over the part you are printing. The extruder is the motor at the top of the rig that pushes the filament down to the hotend. The hotend has a thermostat inside that regulates the temp. For instance, if you print with ABS filament, it maintains the heat at 230 degrees. There are a wealth of settings you need to adjust. Hotend and heated bed temps, extrusion speeds, retraction speeds (the speed the filament is pulled back while the print head moves), bridging speeds, layer heights, whether to cool the part with the fans etc. You also have support structures to consider, if your part is not designed with 3d printing in mind or needs help supporting itself while being printed. I tried printing with PLA, but almost immediately suffered with blockages in the hotend module. Also, PLA appeared to be very fragile and not much good for my projects. So I jumped over to ABS. I had already printed the fan ducting earlier with ABS and I found it much stronger. However, the failure rate with 3d printing appeared to be very high! It either came unstuck from the hotbed, jammed in the extruder, extrudes too much filament, or too little .... the list went on. It was taking hours to print anything slightly decent. 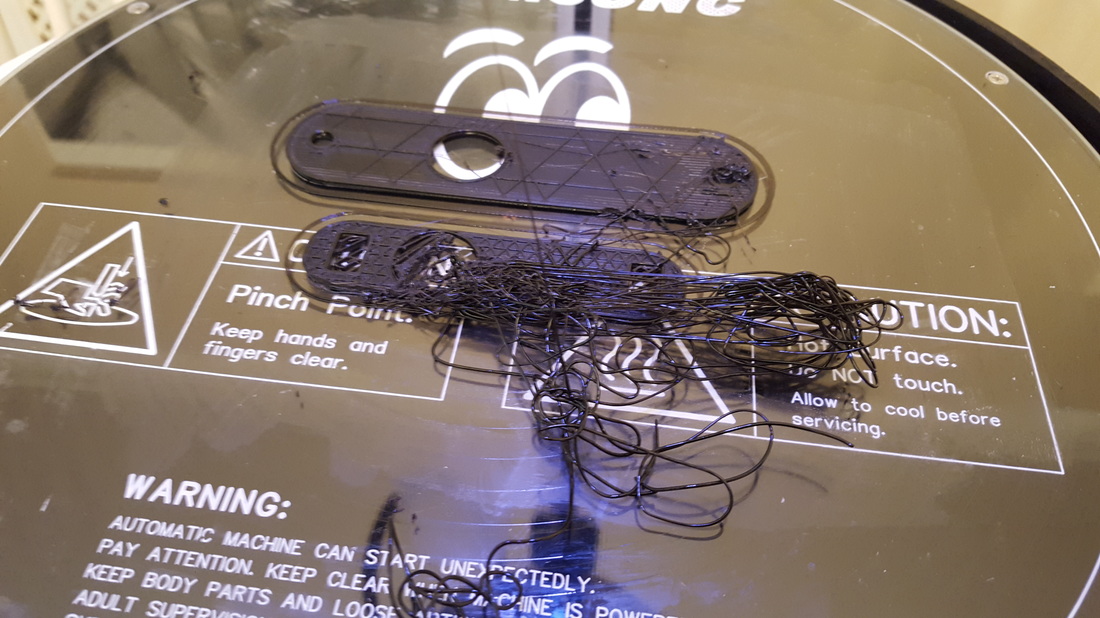
I used everything to try and get these prints to stick to the heated bed. UHU, hairspray, painters tape and ABS slurry (Acetone mixed with old ABS). The slurry appeared to work the best. However ABS suffers from curling very badly. As you print, the corners lift and it all goes pear shaped. I have now switched to a different filament called PETG. It seems to stick to the hotbed better, but I still have yet to get what I would call a decent print. One other addition I fitted was a laser 'monitor'. I built a simple targeting laser, using a cheap laser module off Ebay. You lock it onto your print and it 'watches' to make sure it doesn't release from the hotbed. Some prints can take 20+ hours, so you cannot watch it all the time. Rather than return to a pile of wasted filament squirted all over the place (see picture above), it simply hits the stop button for you. There is a link below to a quick video demo of the system. |
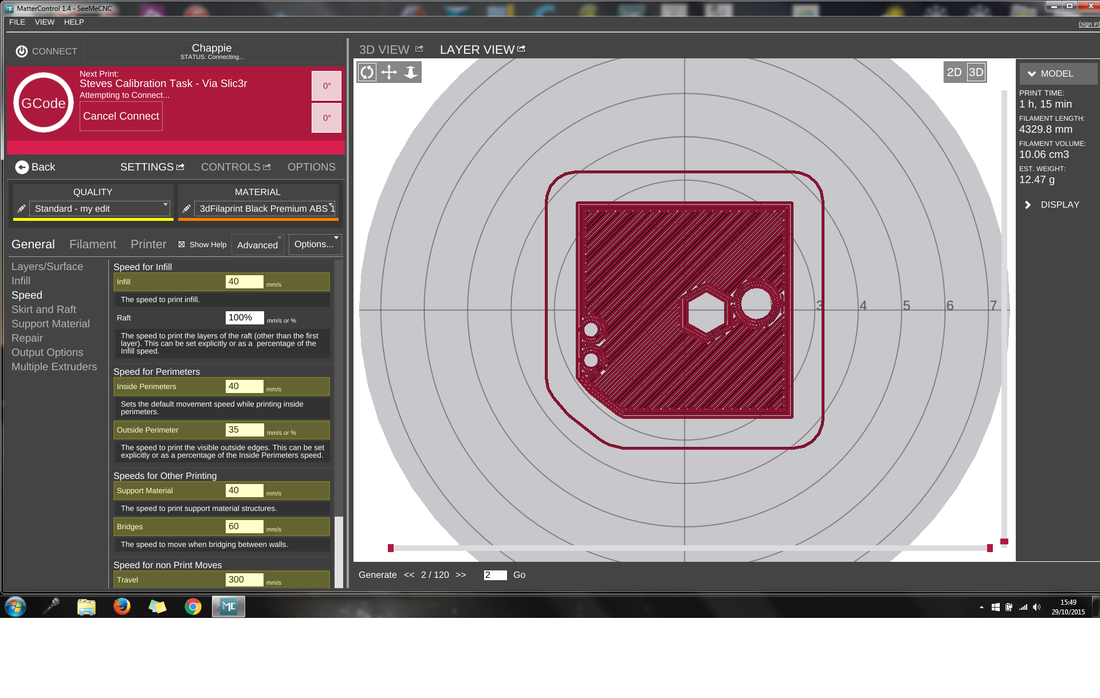
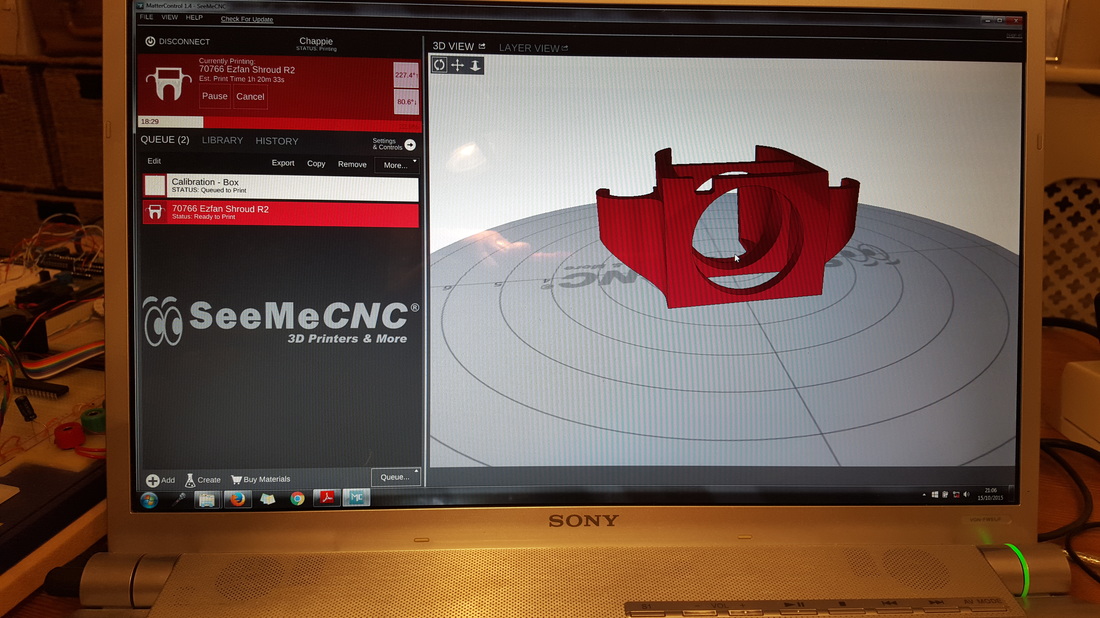
I currently use the supplied software called MatterControl. This handles the slicing (chopping up the 3d printing into layers) and then the actual print settings. A lot of people don't like it, but I have not had issues with it. I think the other software options give you a larger selection of advanced settings, but I have not needed those yet. 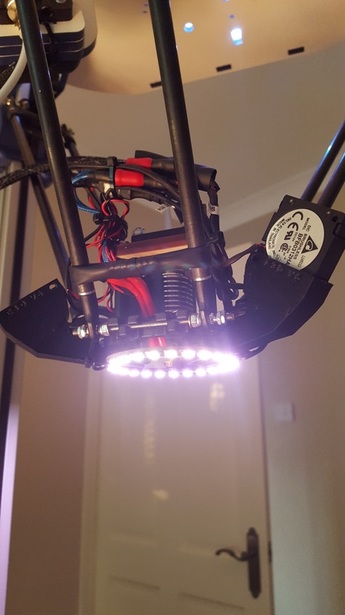
|

One thing that did become apparent pretty quickly is that the E3D V6 hotend 'upgrade' turned out to be pointless.
I have now installed the original factory hotend and basically started again. The V6 hotend just constantly jammed and gave me issues. It does not like to operate with a long retraction settings. Pretty sure I have spent more time cleaning or unblocking the 0.4mm nozzle than actually printing with it. The factory hotend is now installed, but it took an evening of playing around with the PID values in the EEprom settings to get it to hold temperature correctly. The hotend autotune function in Mattercontrol was useless. The temperature would overshoot its target by 20+ degrees. If you were aiming for 220 degrees (for ABS for instance), that gets dangerously close to the melting point of the factory nozzle at 247 degrees. If you are going to have a go at 3d printing. Be prepared for a LOT of time input for little in return! |
Future plansI would be nice to get to a point where I can print my own Nylon bearings, runners or carbon laced parts. That would make this a real handy tool then. I have not really had time to get deep into the world of 3d printing. It is clear that its not a perfect science. Hopefully, I can get repeatable performances once I get the system dialled in a little better. I am also planning to build an enclosure around the entire printer. This will be heated and apparently will assist greatly in keeping the prints at a set temperature and resist curling. I will simply play around with it and get it working consistently. Once that is achieved, then I think it will be an invaluable tool for prototyping and building. 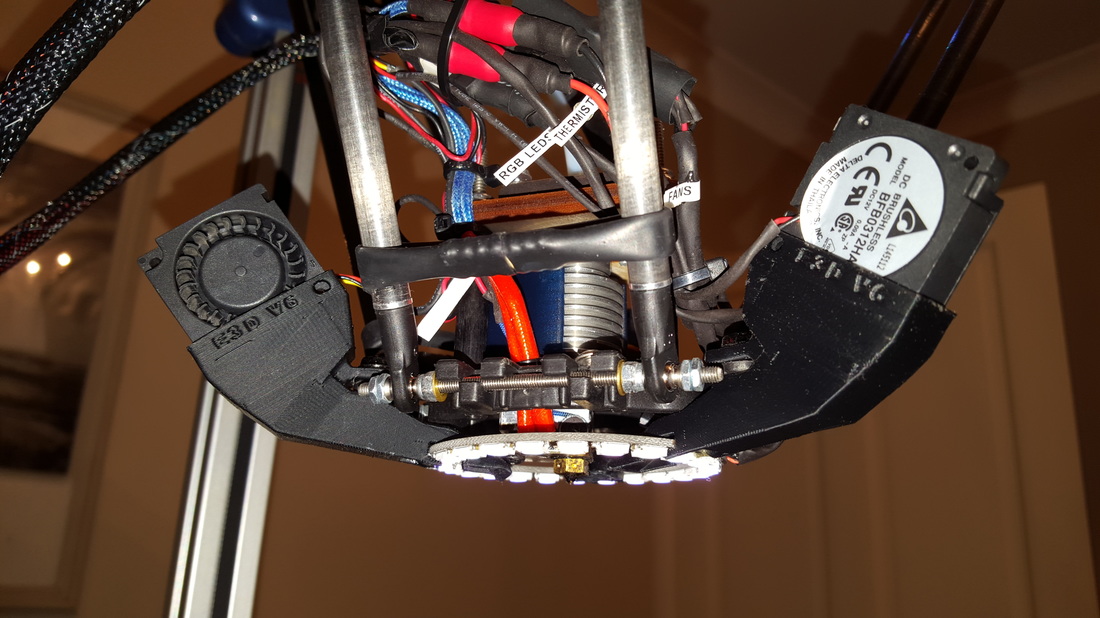
|
Progress! May 2016
|
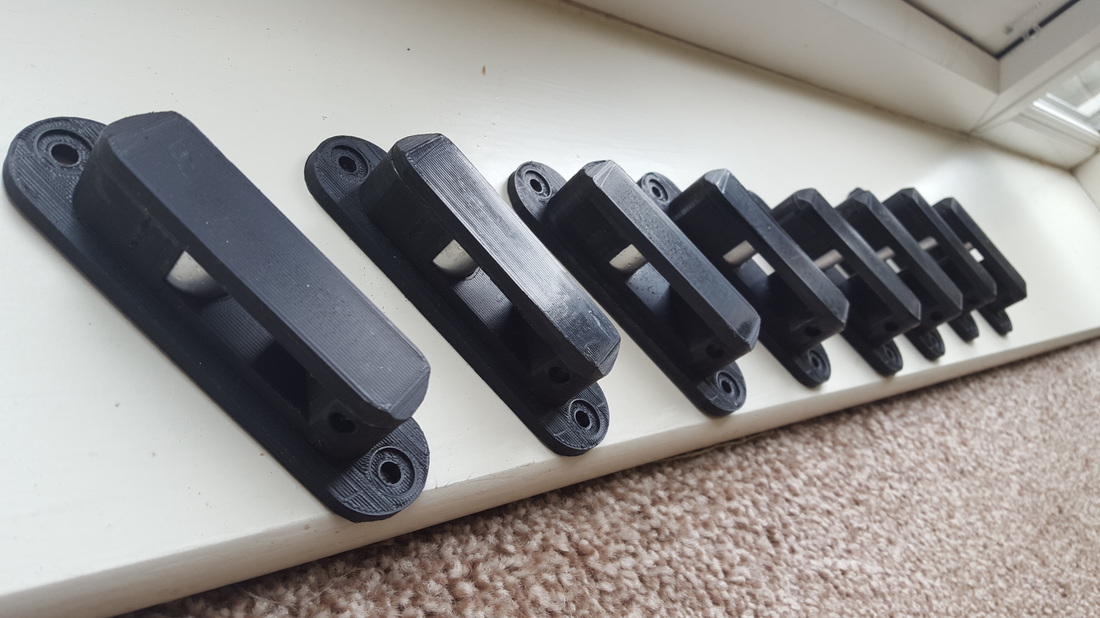
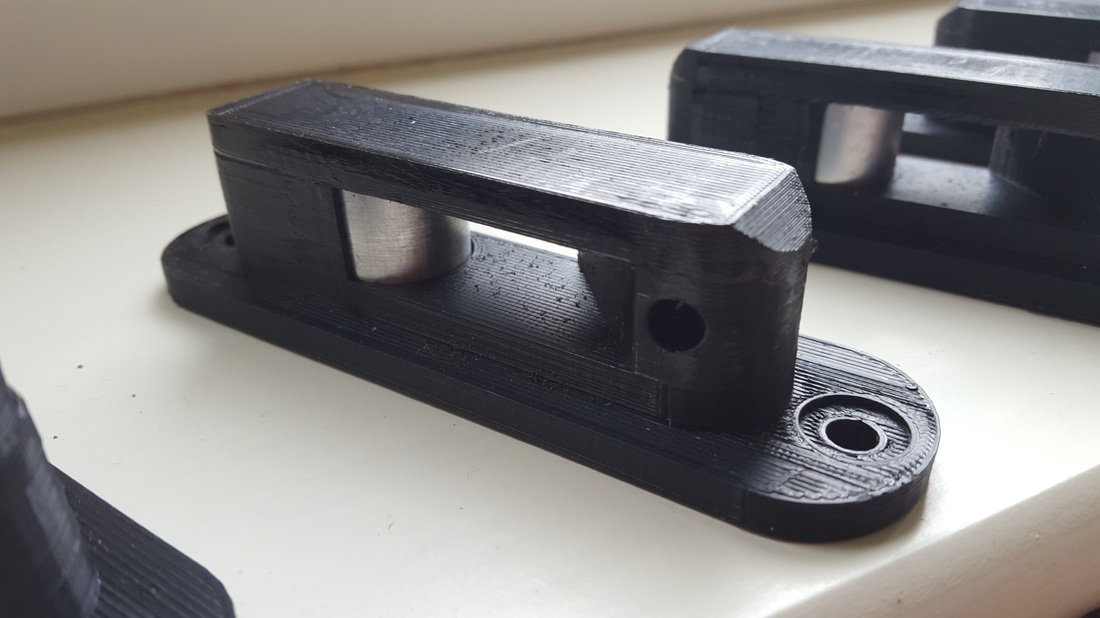
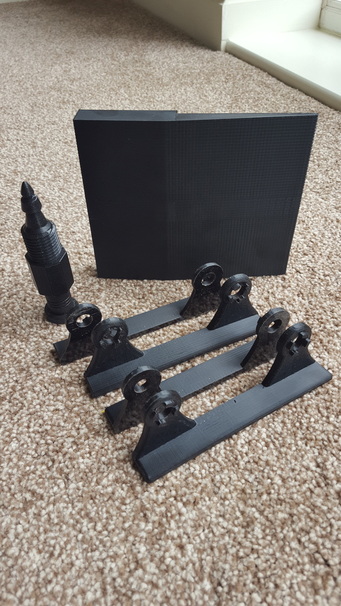
Finally seem to be able to repeat print items. I successfully printed 8x brackets I designed for my truck.
These hold the recovery tracks on the rear lid of the load bay. The trick appears to be basically to keep the print small. Anything too large or with a big footprint seems to suffer curling at the edges and warping. I am having far more success with the stock hot-end. Looks like that upgraded E3D-V6 hot-end upgrade I started with, was a false start. Stick with the factory hot-end. Much better results. |
An overview of 3d printing at home
I have put many hours into this printer. If nothing else, 3d printing will teach you patience. I have lost count how many failures this thing has churned out.
If you are thinking of building a home 3d printer, then don't expect it to produce easily repeatable results. There are FAR easier and faster ways of producing prototypes and parts.
I spent an entire week of evenings trying to print a spool holder for the top of the printer. 7 attempts later, I gave up and built one out of wood instead in half an hour.
Home 3d printing just isn't there yet. It had a flurry of excitement at the beginning, and now seems to have died off a bit.
You seem to have a few die hard types that are getting good results, but the time and effort spent can be frustrating.
If you want a piece of home manufacturing equipment, then a lathe, milling machine or CNC machine would probably be a far better spend.
But, having said all that... I have now got to the point where I can produce some pretty decent items.
it can be a case of a simple mistake on your part that messes up a print. For instance, I watched an 11 hour print go wrong at the 8 hour mark, purely because I forgot to tick the 'produce support' box at the start.
If you do get your printer set up. My basic advice would be check settings, check the slicing and then check the setting again!
Oh, then check the settings again.
The heated cabinet has made all the difference. The ABS prints do not curl at all now.
I run the hot-end at 230 degrees, the hotbed at 90 degrees and the enclosure is heated to 50 degrees.
I use a thick ABS slurry (Acetone and old ABS melted in a jam jar) as an adhesive to the hotbed.
When the print has finished, the items break free of the glass very easily.
My original Borosilicate glass disc that came with the printer cracked. They were very expensive and so I simply used a piece of old 3mm glass I had in the workshop. Its worked fine. Totally do not need to pay for Borosilicate glass.
Happy days!
Heated enclosure makes all the difference
After the addition of the heated enclosure, the prints have started to become a lot more reliable.
The quality has now certainly improved, and I seem to be getting the best results using a reasonably thick 'ABS juice' mix to hold them on the heated bed.
The quality has now certainly improved, and I seem to be getting the best results using a reasonably thick 'ABS juice' mix to hold them on the heated bed.
|
|
|
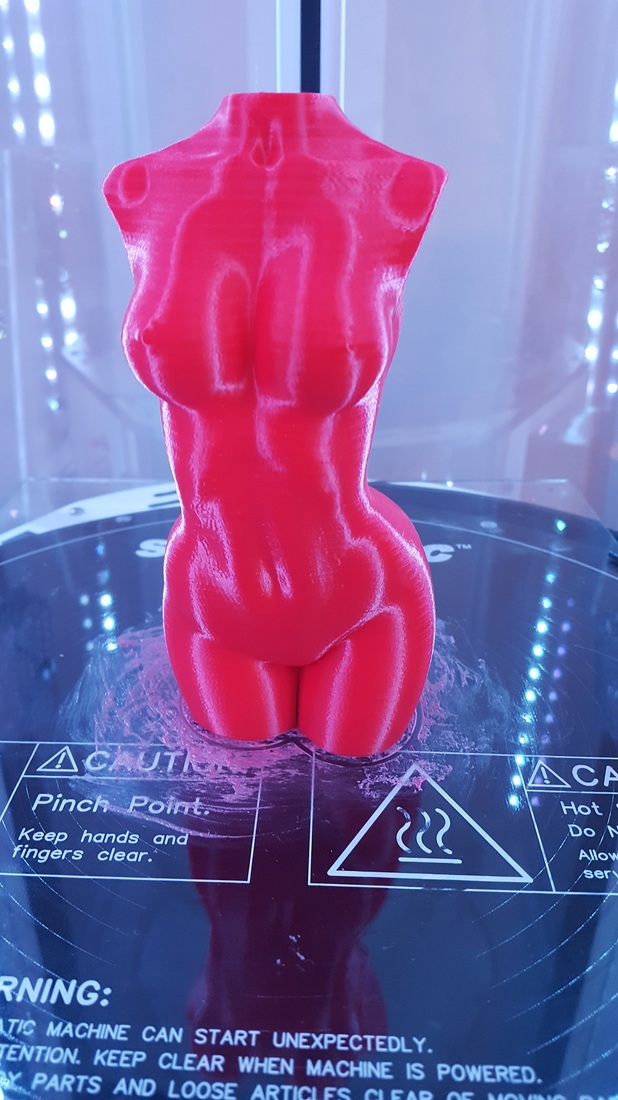
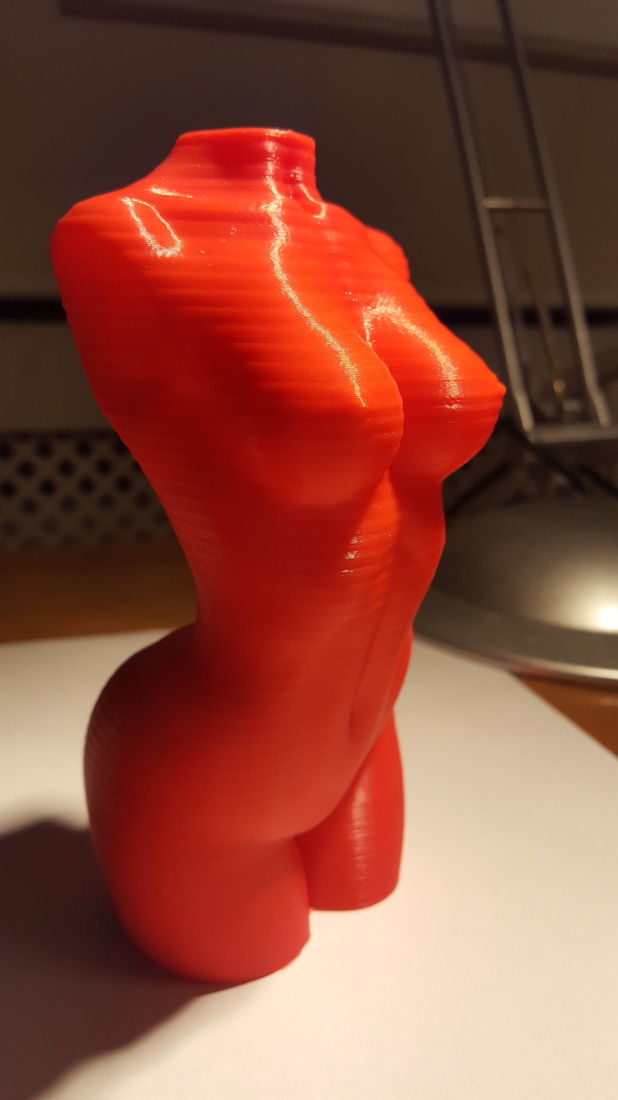
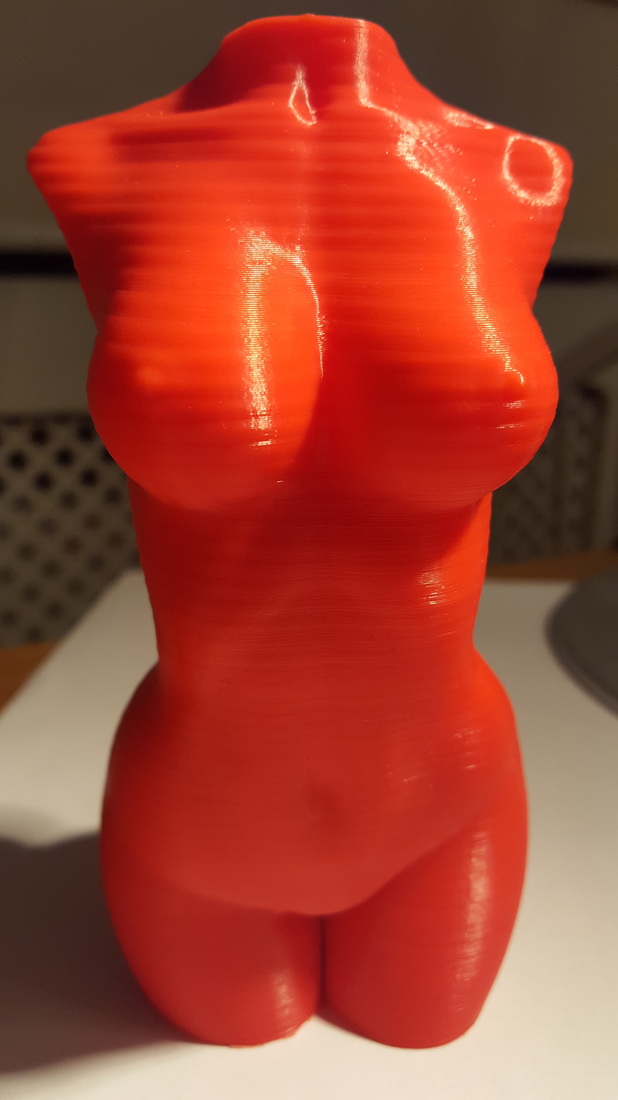
Of course I'm gonna print boobs. I'm a man.

An overview several years later...
Crap. Yes, it's taken a while to find this out, but I just have never got this machine to work well.
There will be people out there who certainly don't agree, but the temperamental Delta style printers in my opinion are just not worth the hassle.
My Flashforge Creator Pro cost half the amount, and yet produces FAR superior results. I never use the RoStock printer now, to the point where I intend to dismantle it to salvage the parts.
It's a shame, but the time and effort put in is certainly not worth the hit and miss results. I would steer VERY clear of a Delta style printer and go with a horizontal rail style machine.
There are newer versions of the Rostock, but personally, I doubt they are much better.