
|
It's a simple Advent house.
|
Why. I ask myself that on a regular basis. In fact, probably on a daily basis.
I have watched Christmas Vacation many times. Who hasn't? Up there as one of the staples of Christmas TV.
So I decided I wanted a version of the Advent house they use in the film to show the run up to the big day.
You can actually buy these things pre-built. But they are something like $2000. Can't be that hard can it?
Oh, it can.
|
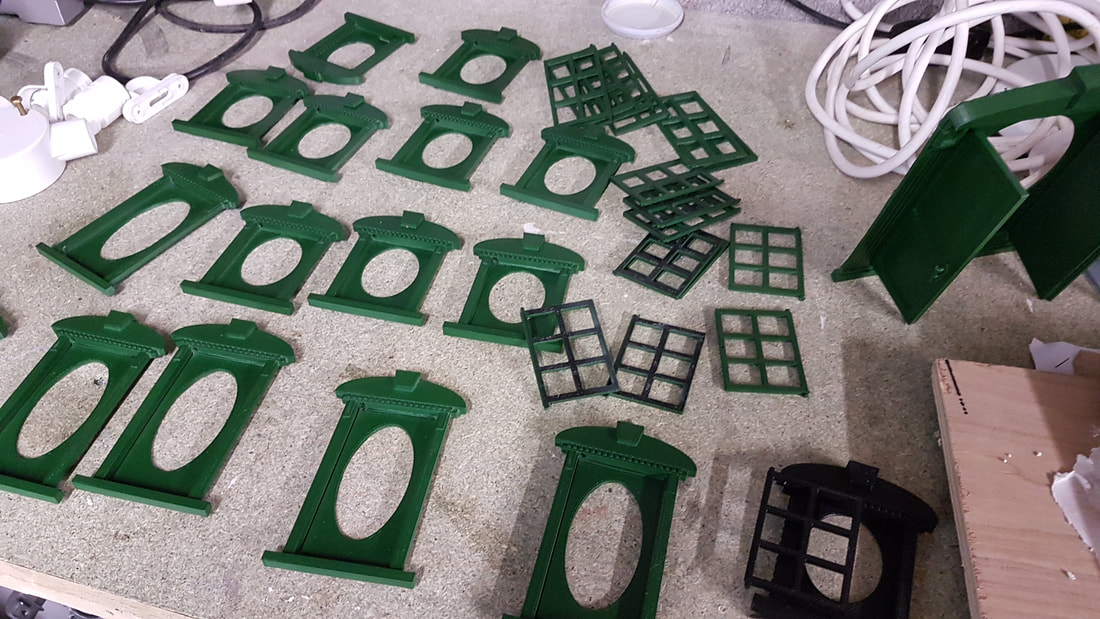
First job. Lots of windows and a door.
Turns out there are various designs for this house with differing amounts of windows. I settled on my design and carried on. I could not find suitable doors and windows on Ebay, so I designed some in Tinkercad and 3d printed them in 3 parts. Ideally, I would have printed them in the correct shade of green, but I only had black PLA, so I just painted them afterwards. It turned out there are rather a lot of parts to print. The obscure glass also proved to be a real pain. I bought some frosted thin plastic (covers from some office storage folders), but it was a type of polythene and just refused to glue to the windows. So, after a whole lot of messing around, I simply printed some sheets of clear 3d print material which actually comes out frosted. This was impact glued to the windows and onwards we go. |
|
Electronics. Of course there are electronics.
I decided I wanted a little more than the standard plain Advent house.
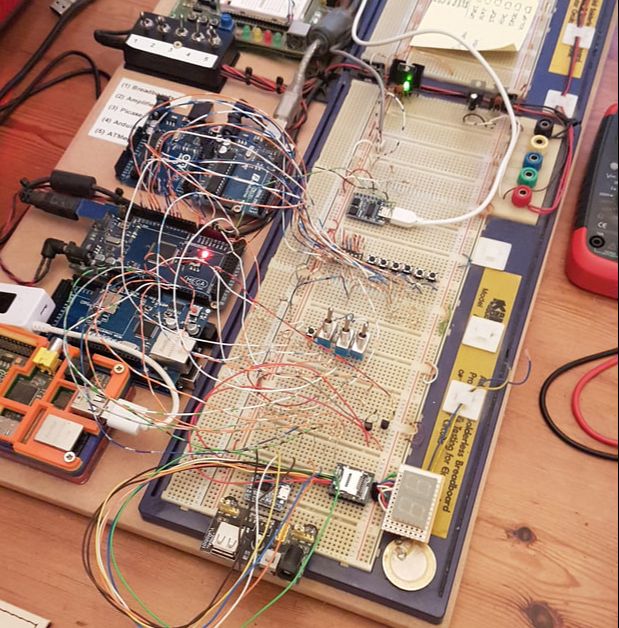
There will be an MP3 module inside loaded with Christmas tunes. There will also be phrases from the movie, and the theme tune.
Finally, as each window is opened, there is a little twinkly jingle played in the film. I want that too!
I found some VERY cheap MP3 modules on Ebay and ordered a pile of them. They are JQ8400 modules and nothing short of brilliant little things for only a few pounds each delivered from China.
|
These modules can read files from USB or SD cards. Or even, directly off your PC.
I simply used a microSD to SD card converter and used an old SD card I had lying around. I added a couple of 7 segment displays to indicate the bare minimum of information when using the MP3 player. Basically: ST = Stop PL = Play PA = Pause FF = Forwards BA = Backward 0-31 for the volume Track number On the back of the house will be a set of selection switches. When you open a door or window, then you can trigger any/some/all of the following: |
|
1/ Christmas Vacation 'Jingle'
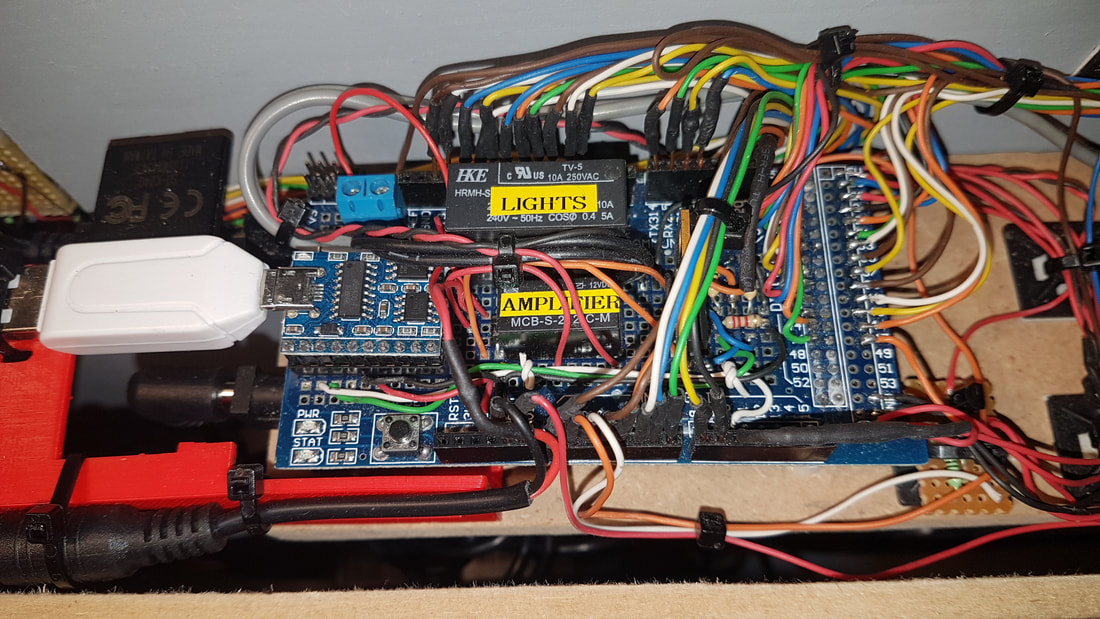
2/ Christmas Vacation theme tune 3/ Phrase from the movie 4/ A Christmas song You can also select whether you get a random movie phrase, or a preset one. Same goes for the Christmas song. There are also switches to turn on the lights, and also an automatic lighting function. There are two buttons. One is a system reset (back to all defaults). The other button sets the lighting level that the house lights will turn on at. Each window and the main door have a microswitch on them. These are wired to trigger the appropriate action. At switch on, the Arduino Mega2560p notes what windows are already open, otherwise the house would have a fit and play all the music that the open windows were requesting. |
|
|
The lights are simply white 5050 Leds on a strip.
I mounted them on a vertical board where possible to get better light spread.
Around the guttering are some old mini fairy lights that came out of some crappy solar light we used to have in our garden.
I suppose I should briefly mention the house itself.
Basically 6mm MDF. OH MY GOD, how many holes for windows did I have to jigsaw out... seemed to take forever.
Oh to have a CNC machine. I took zero care when it came to cutting out the holes neatly.
They are never going to been seen once the windows are in.
I basically built it out of crappy old timber I found laying around the workshop.
The walls were covered in brick paper I got from good old Ebay.
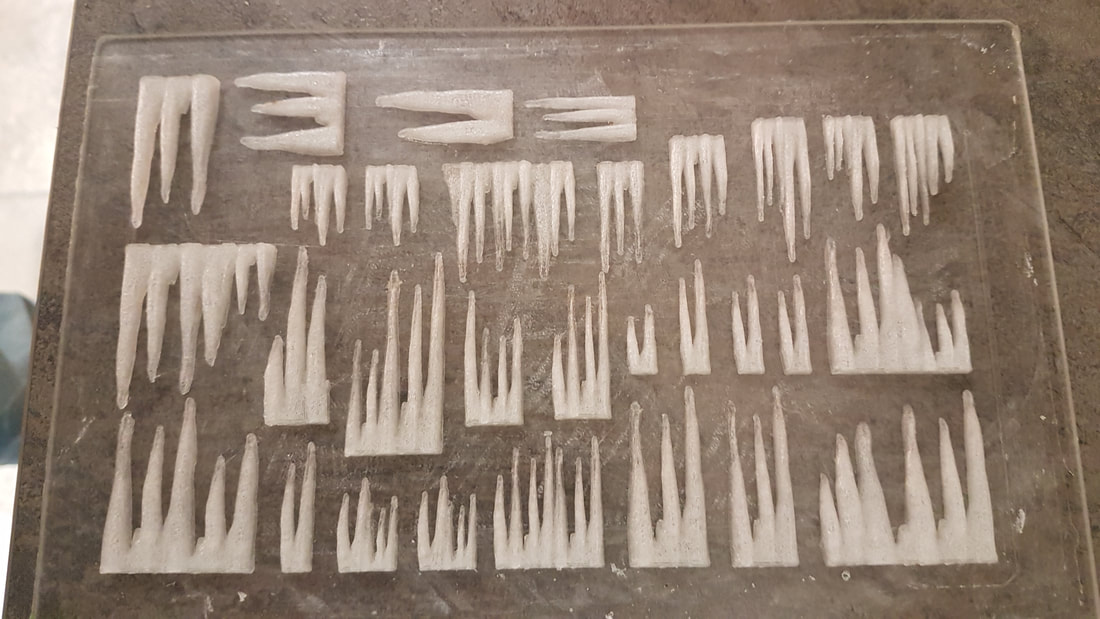
Icicles were 3d printed using clear ABS. Then, EVERYTHING stuck together with a hot-glue gun.
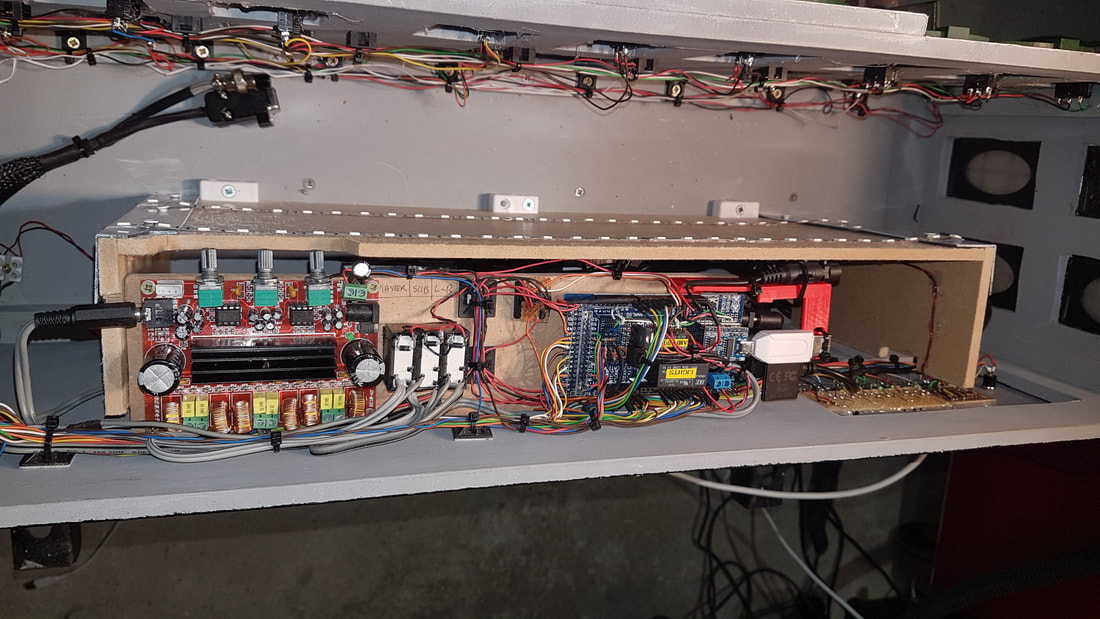
Power supplies. I under-estimated how much juice this thing would pull.
I had some old computer PSU's, but they turned out to be very electrically noisy and you could here them through the speakers.
So it ended up having 2x 3.15A power supplies running the Arduino and the lights separately.
I mounted them on a vertical board where possible to get better light spread.
Around the guttering are some old mini fairy lights that came out of some crappy solar light we used to have in our garden.
I suppose I should briefly mention the house itself.
Basically 6mm MDF. OH MY GOD, how many holes for windows did I have to jigsaw out... seemed to take forever.
Oh to have a CNC machine. I took zero care when it came to cutting out the holes neatly.
They are never going to been seen once the windows are in.
I basically built it out of crappy old timber I found laying around the workshop.
The walls were covered in brick paper I got from good old Ebay.
Icicles were 3d printed using clear ABS. Then, EVERYTHING stuck together with a hot-glue gun.
Power supplies. I under-estimated how much juice this thing would pull.
I had some old computer PSU's, but they turned out to be very electrically noisy and you could here them through the speakers.
So it ended up having 2x 3.15A power supplies running the Arduino and the lights separately.
All the windows and doors have neodymium magnets on them to help hold them closed. These were needed, as the tiny microswitches I fitted pushed the windows open.
The roof lantern was also a challenge. I had a go with perspex at first (which kind of worked), but then decided to 3d print it in sections using the same frosted effect ABS I used on the windows.
Then after a lot of swearing... I got all the panels to glue together.
The roof lantern was also a challenge. I had a go with perspex at first (which kind of worked), but then decided to 3d print it in sections using the same frosted effect ABS I used on the windows.
Then after a lot of swearing... I got all the panels to glue together.
Snow.
|
Seriously, how difficult is it to make fake snow?
Baking powder apparently will yellow over time, so I tried a small bag of snow white nail glitter off Ebay. Lots of PVA glue, and sprinkled liberally. I fixed it all in place using non-scented hairspray. Where it went a little off colour, I just air-brushed over it with gloss white. Couple of (madly expensive) dolls house lanterns for the front door finished it off nicely. |
|
I hate this house. I really do.
This was not one of my more enjoyable projects. I gave me a headache from start to finish.
Sometimes... that happens. The sheer amount of 3d printed components was ridiculous.
But.... it is complete.
Happy Christmas!
Sometimes... that happens. The sheer amount of 3d printed components was ridiculous.
But.... it is complete.
Happy Christmas!
