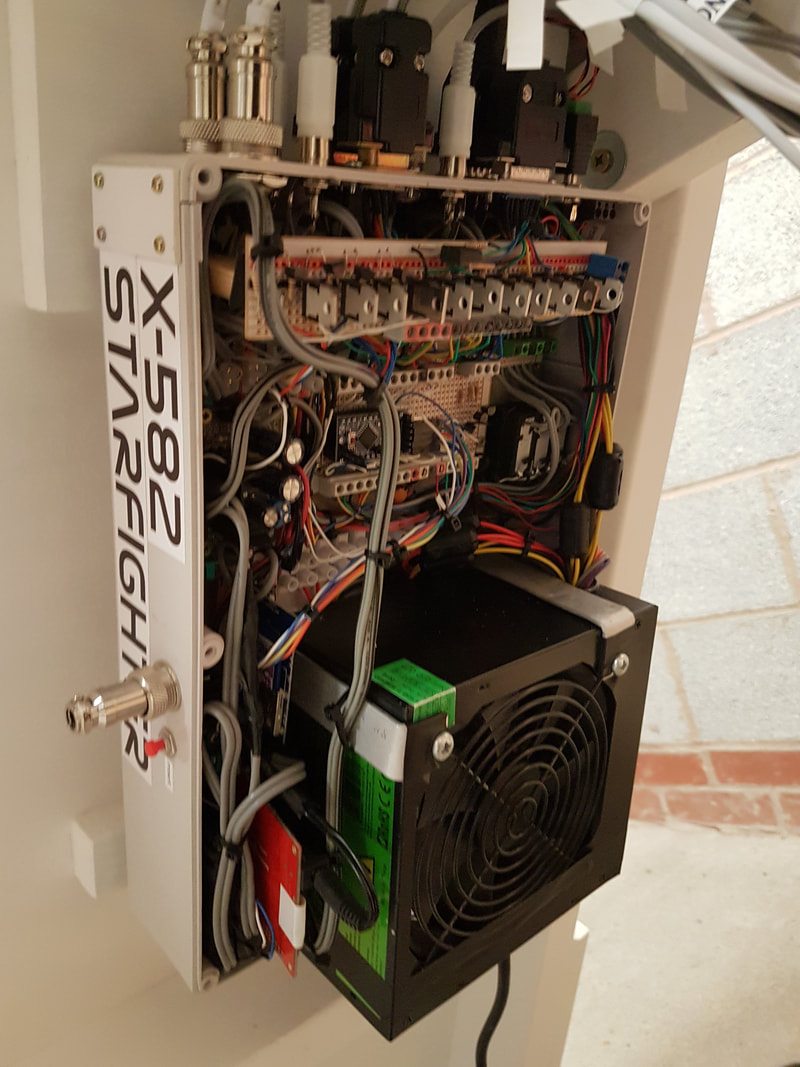
Otherwise known as the annoying box underneath that I have to keep changing.
I started off with a 700W computer PSU. This turned out to actually be a pain in the bottom. Wow... computer PSU's are noisy!
I had to add quite a lot of suppression and introduce ferrite coils on a lot of my serial communications lines.
There are various elements to the module. It contains the following:
Wav player module for the sound effects and voice.
MP3 module for the music
8W amplifier for the centre rear 6" x 9" speaker
Various TIP122 and TIP127 transistors to switch the led lighting on (such as thrusters or landing lights).
3x 12v relays to provide anti-thump protection to the speakers upon initial power up.
An Arduino Mini-pro to receive the commands via serial from the cockpit Arduino 2560p.
|
|
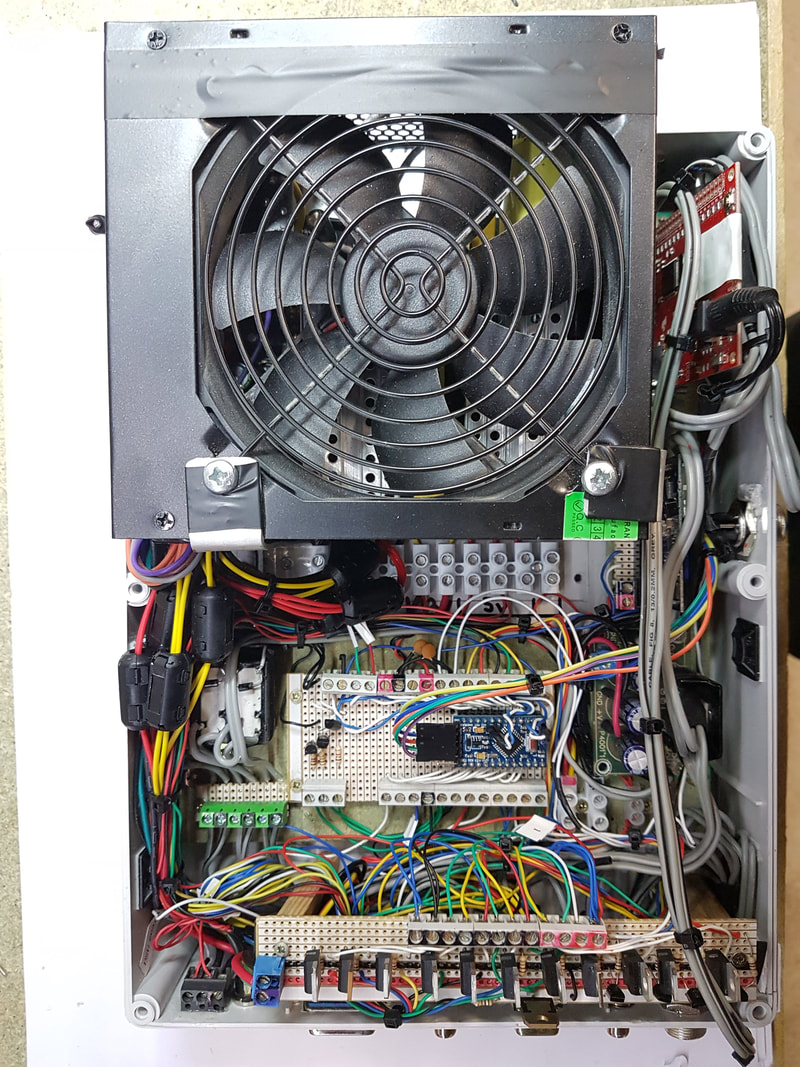
The top of the unit has all the connections to the various parts of the ship.
Lighting, speakers and comms lines all meet here. I found a computer sub speaker at a car boot sale, so that got painted red and incorporated to run the side 5" speakers and provide some bass. I fitted a relay inside this sub speaker to provide anti-thump protection when the computer PSU first fires up. I did originally get 300mm extensions for the SD cards, so they could be mounted outside the enclosure. |
However, I found these ribbon cable extensions introduced a considerable amount of interference and lead to reliability issues.
The plugs and sockets on the top are deliberately all different types to prevent incorrect connections of the various cables.
The plug on the left of the housing below is the programming port for the Mini-Pro.
The computer power supply enable wire is run to the 'Power on' toggle switch in the cockpit. When you toggle this switch, it fires up the computer PSU.
In turn, this initialises the cockpit Arduino 2560p which instantly outputs a 5v signal to a TIP122 to switch an 0v to the computer PSU enable line and hold it on (Irrelevant of the state of the main power toggle switch).
When you switch off the cockpit power toggle switch, it signals the Arduino via a different input pin that you would like to shut down the ship.
The ship can then go through a considered shut down process before finally dropping the high to the TIP122 and allowing the computer PSU to power off.
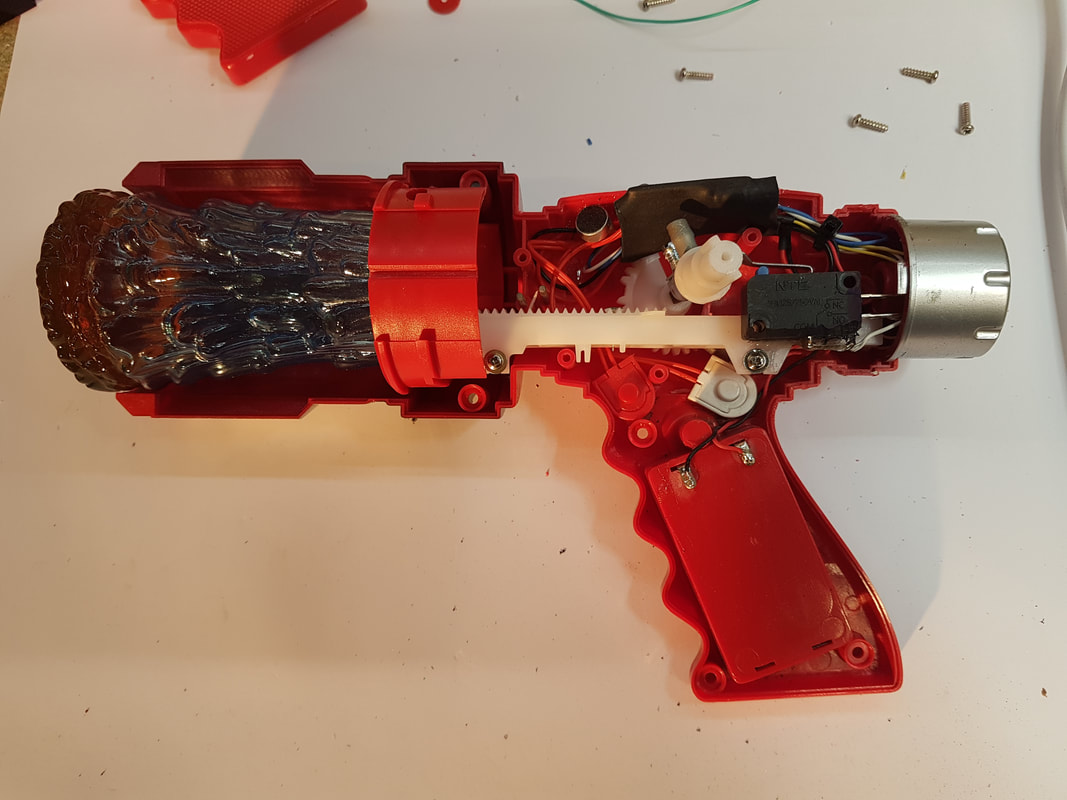
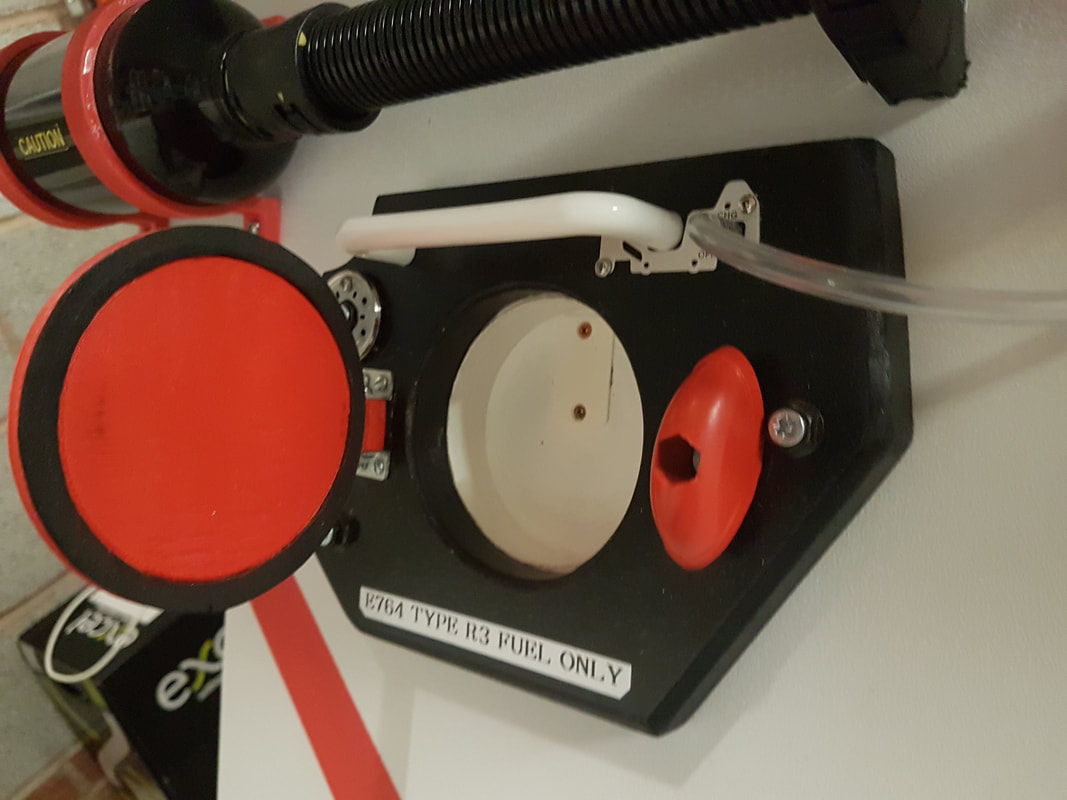
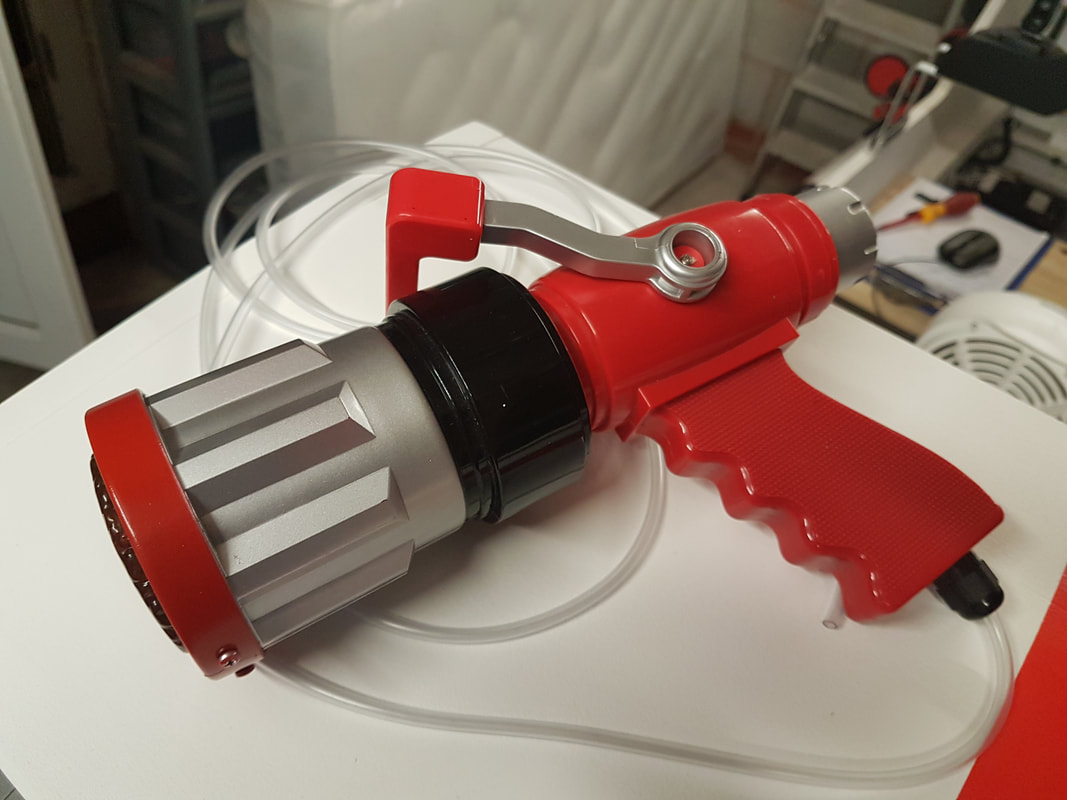
On the Starboard wing is the refuelling port.I found a children's fire hose gun thing at a car boot sale for 50p.
It had a sound effects chip inside that played a bad SFX of water and various fire engine sirens. I took that out.
I instead added a small sound effects circuit that I got for £1 on Ebay and connected it to the existing internal speaker.
This now has the sound effect of 'Refuelling' playing when you operate the pull handle.
The end of the gun has neodymium magnets inside.
In the receiving fuel 'socket', there is a reed switch which signals the cockpit Arduino when it is being refuelled.
|
|
|