Yes, it's time to burn things, and generally create mayhem
|
I have always planned to have a laser on the MPCNC.
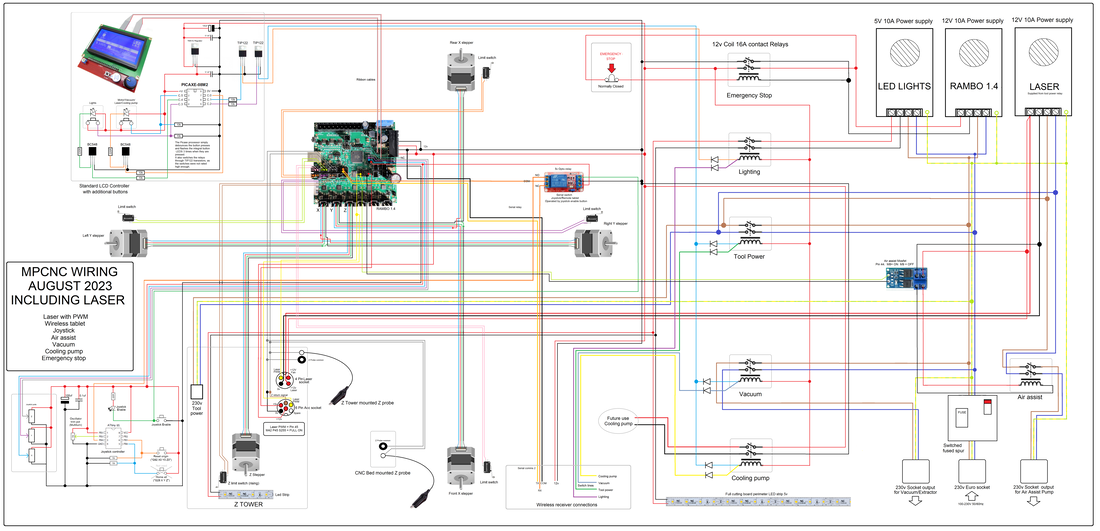
The router attachment unbolts with a few Hex machine screws, and then you simply bolt on you next tool. When I wired the MPCNC originally. I wired a decent feed up to the head of the central tool post to allow for a dedicated laser power supply. This was a 4 pin socket, with:
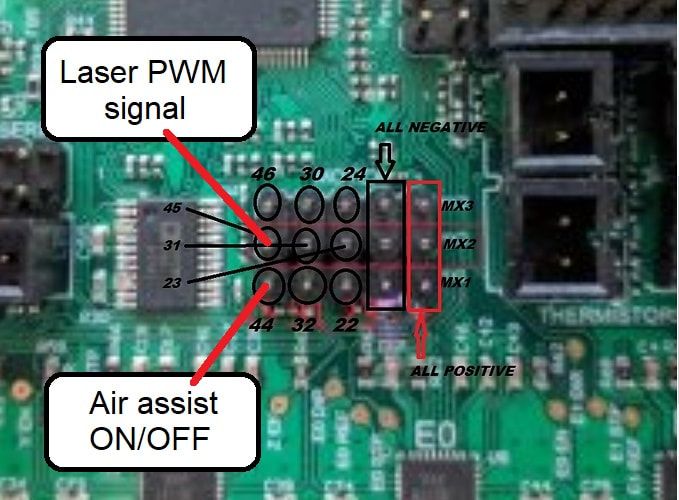
The PWM signal to the laser is via pin 45. This needs to be enabled in the Marlin software uploaded to the Rambo 1.4 processor board. As these boards and the software have developed, they have become too large to upload to the MPCNC board from the Arduino IDE. Therefore you need to use PlatformIO which personally, I find massively complicated. But, once you finally get it loaded, you edit what you need. Usually |
|
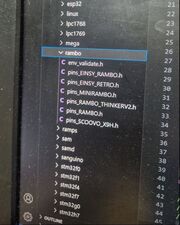
Check the pins are assigned correctly for your board. Mine are in rambo/pins_RAMBO.h
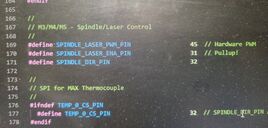
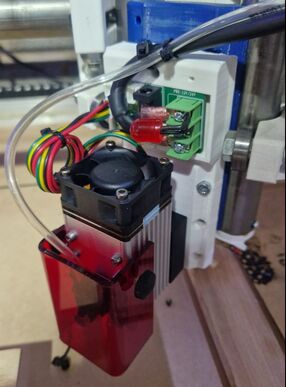
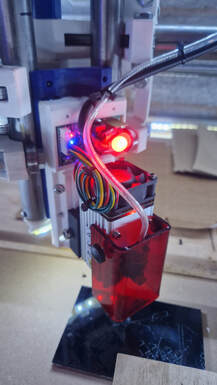
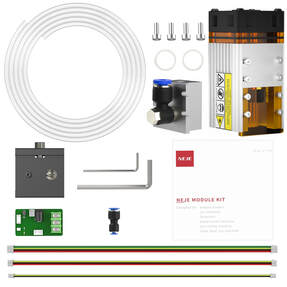
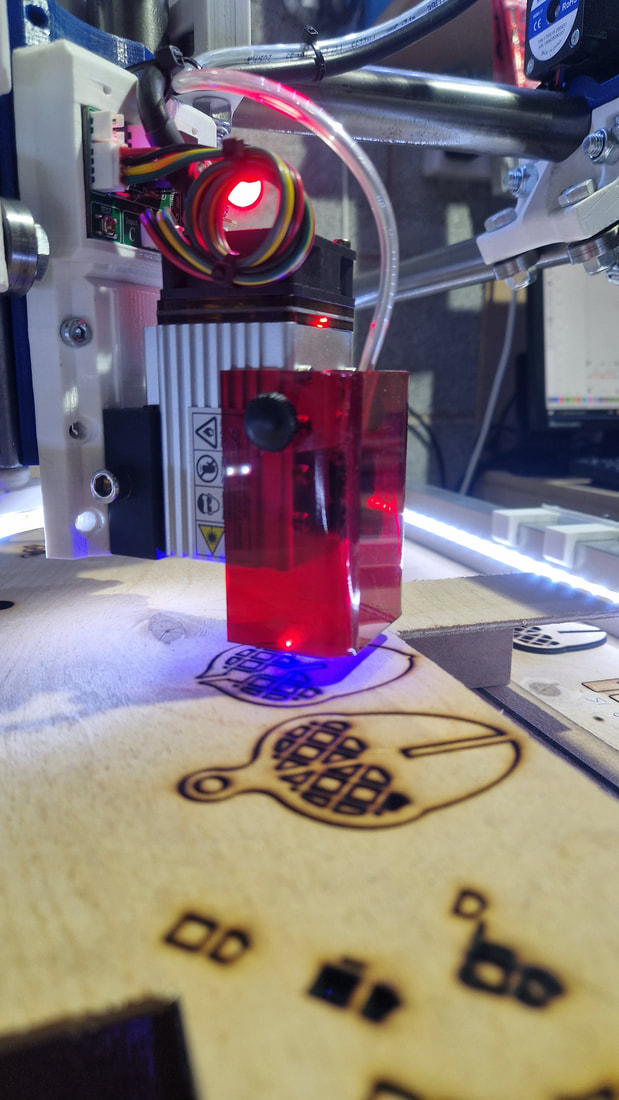
In Configuration_adv.h, you will find the Spindle_Laser_PWM_PIN definition. Enable this (uncomment). I am not using the Laser enable pin (31). My laser power turns on with the master head power button I added to my LCD control. The Neje 40w laser I purchased from AliExpress came with a breakout board and the required air assist piping. I designed a base support frame for the laser that fitted the MPCNC tool post. At the top, the laser connections are made in the supplied PCB (why not). I added a large 10mm RED led to the laser supply feed so that I had an obvious indication of when the laser was powered. I also purchased a red laser guard to fit around the laser housing. It didn't really fit, but does the job. |
Air assist
So, at first I used my huge Stanley air compressor. But soon realised it was throwing moisture down the air assist pipe and spraying it over my target surface. Great.
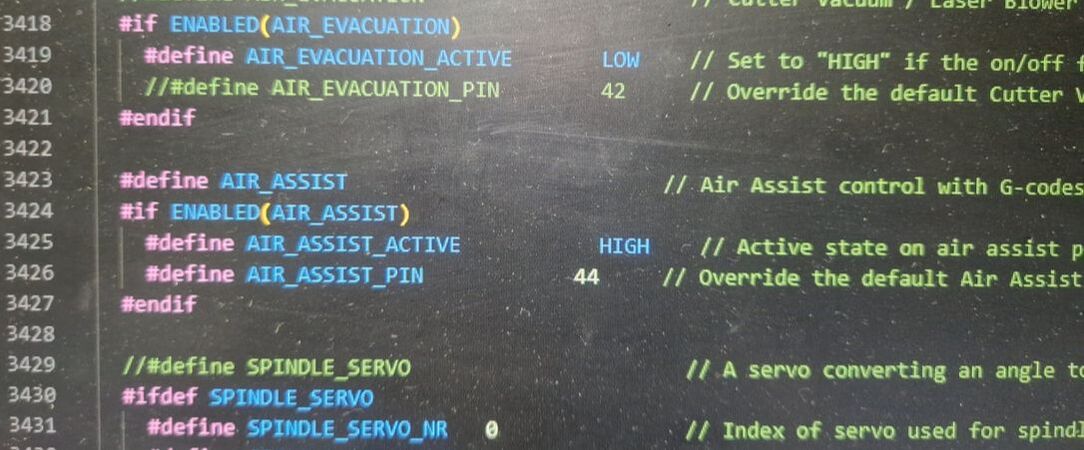
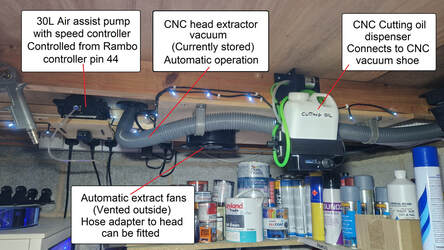
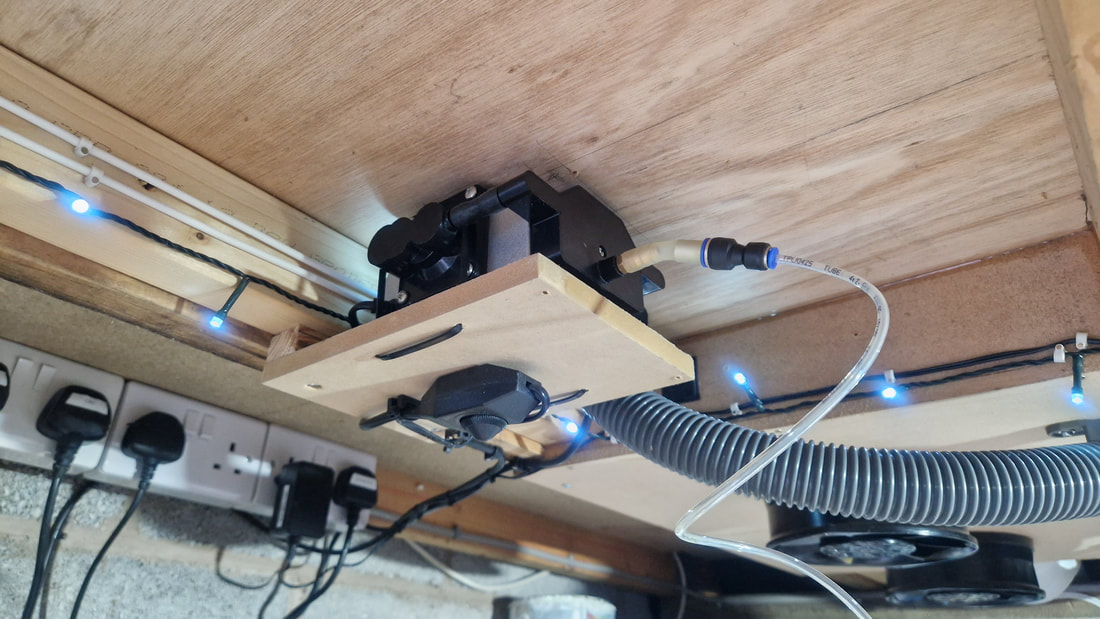
So I purchased a 30L Sculpfunair compressor off Ebay and mounted it above the CNC bed on a plinth. It has rubber feet and runs very quietly. It also came with a speed controller, so I mounted that underneath, as I doubt I will vary that too much. I then dug around the workshop and found an old machine with 2x nice 230v extractor fans in it. I robbed those, made a ceiling frame and vented them outside. Later on, I will make a custom ducting from one of the fans down to the cutting head, but they work quite well. The air assist pump is operated by a 12v coil relay under the CNC bed, that is in turn controlled by a small Mosfet board. This Mosfet is turned on and off by pin 44. This means the air pump will run while the laser is in operation (if you so wish). |
Time to tune
Before using the laser, I fitted my pen holder to the CNC tool tower and tried the Lightburn software with that.
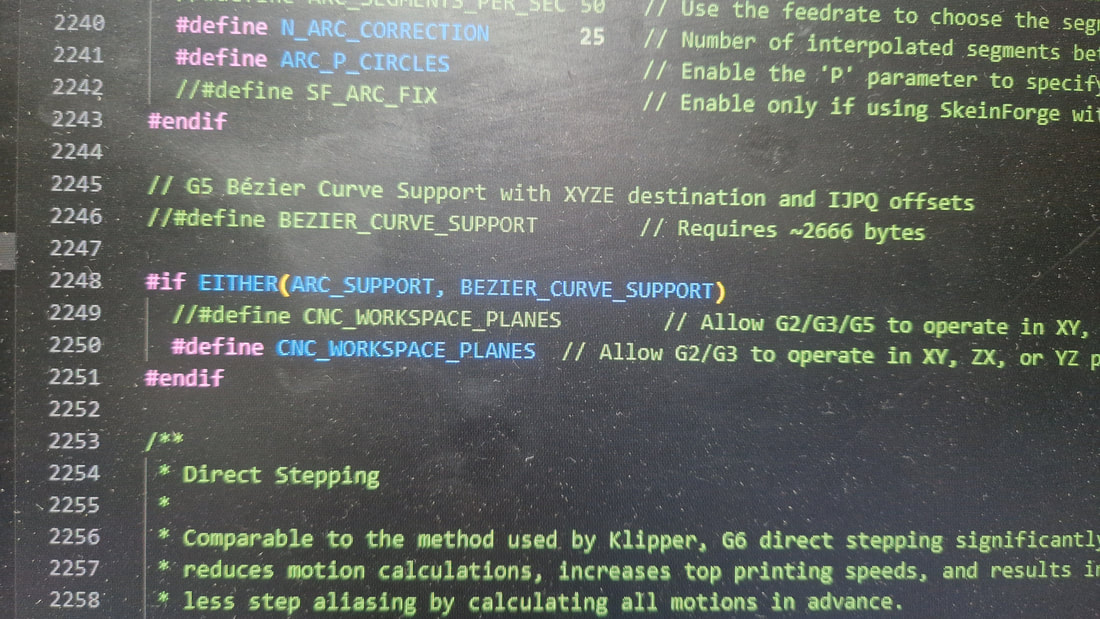
I had very bad stuttering on the curves. To fix that, I enabled ARC_SUPPORT in the config file. This made it better, but not great. Installing version 515 of Marlin fixed it however. This version definitely will only load through PlatformIO, as it has grown in code size, but supports lasers much better. Once happy with the results, I re-installed the laser and configured Lightburn. |
M42 P45 S### sent to the laser in G-Code will turn the laser on. The 'P45' is pin 45, and the 'S' is the power value from 0-255.
M106 P45 S### Will also turn the laser on to a set level.
M107 =Laser off.
M8 = Air assist on
M9 = Air assist off
M42 P44 S255 Will also set the air assist pin to ON
On some control boards, M3 or M4 = Laser ON, M5 = Laser off. You will need to try your setup.
Lightburn is still something I am learning. One issue I have is STOP doesn't mean stop. It does turn the laser off, but it continues to move the laser head.
This is an issue I am working on, but I can always hit the emergency stop button I installed.
Now focus...
I have literally spent hours (probably days) trying to get this laser focused correctly.
I believe I finally have it dialled in at 36mm from the bottom of the housing, but I will report back on this once I get it fully set up.
I believe I finally have it dialled in at 36mm from the bottom of the housing, but I will report back on this once I get it fully set up.
Now lets make this look a bit more professional....
|
Now the first redesign I would like to address is the fact that the laser is mounted at 45 degrees to the work bed.
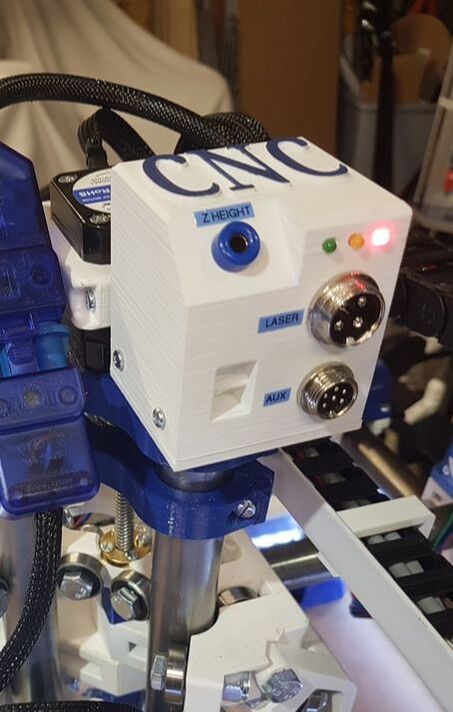
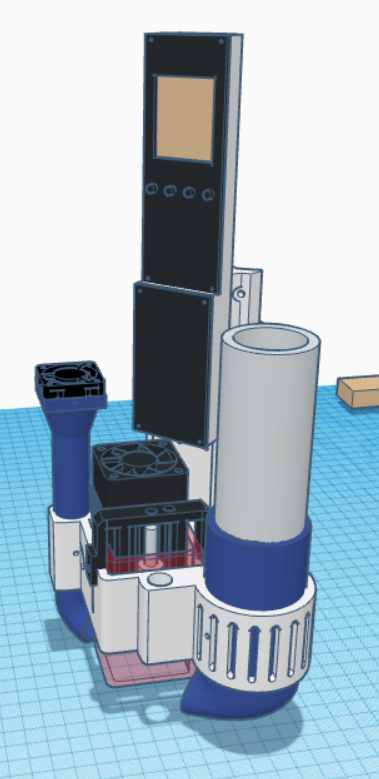
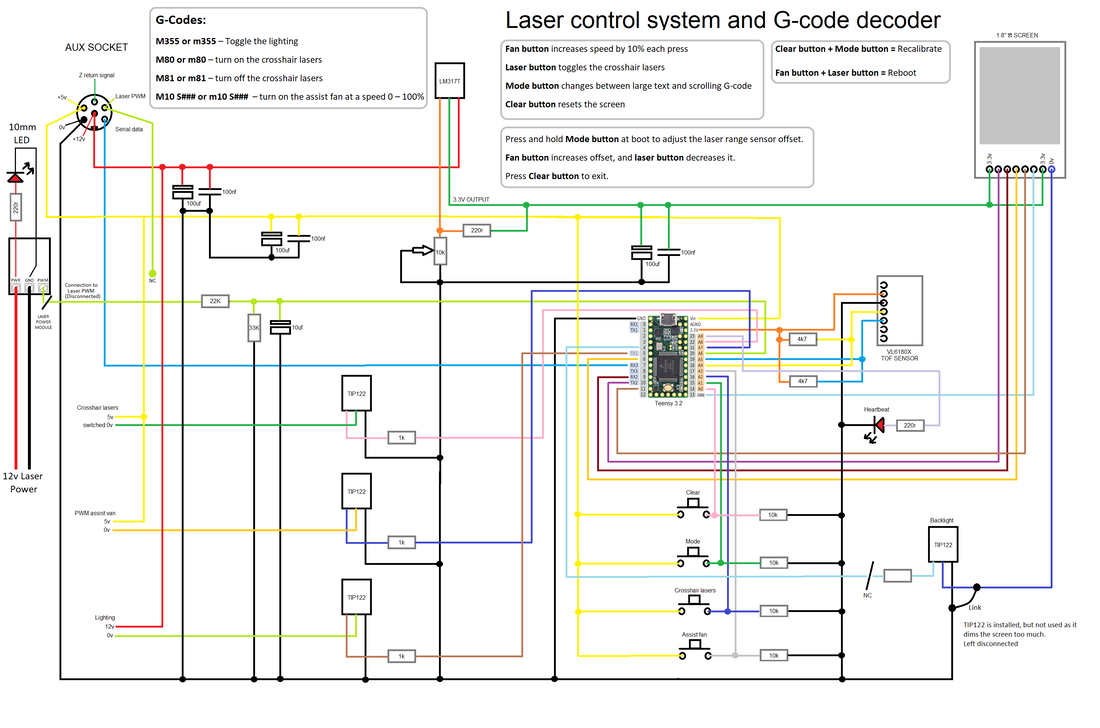
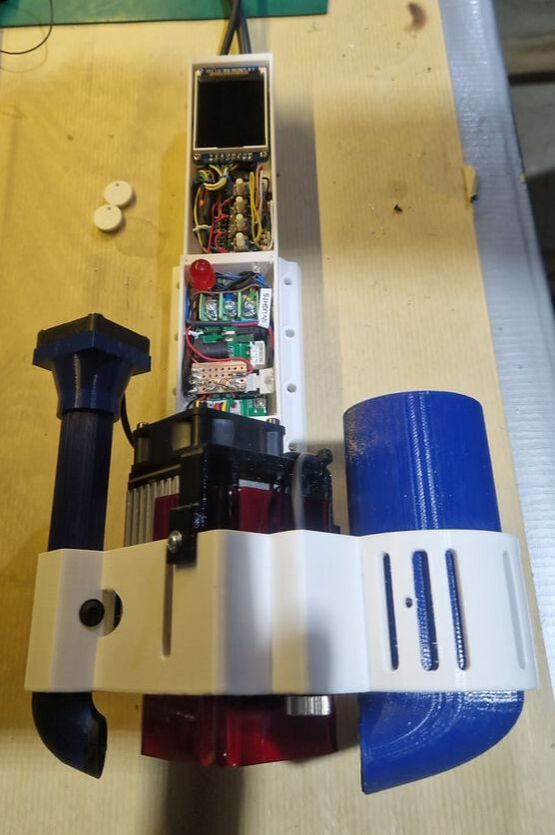
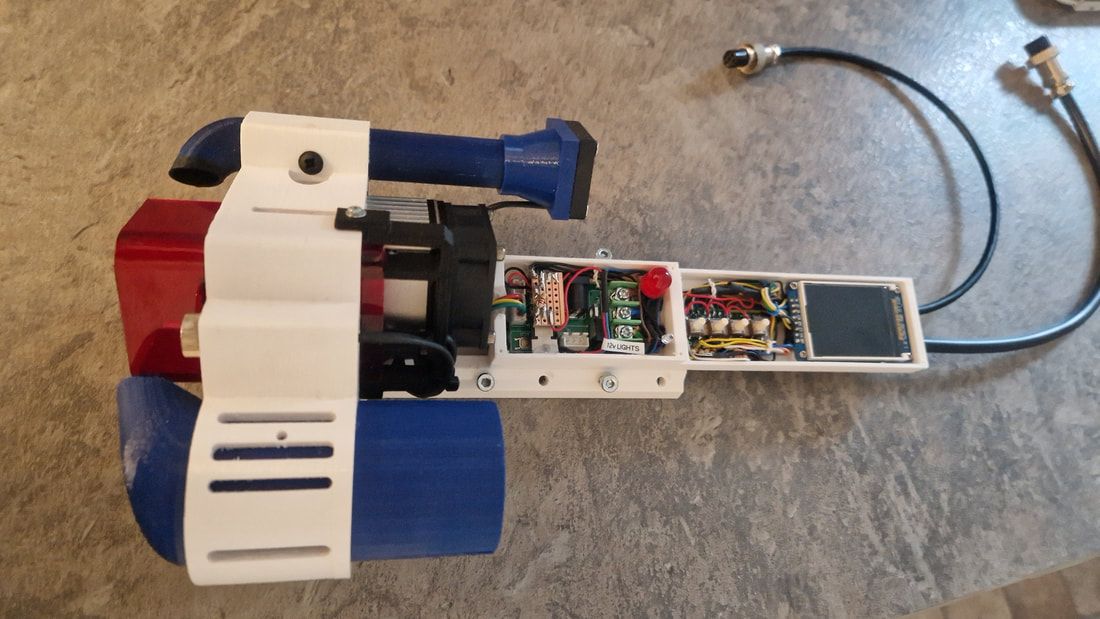
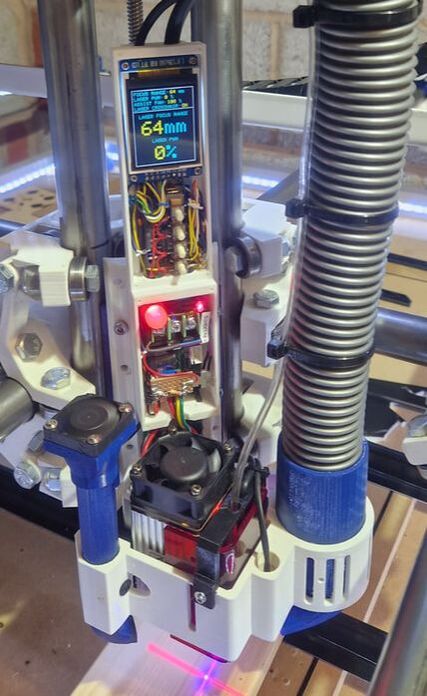
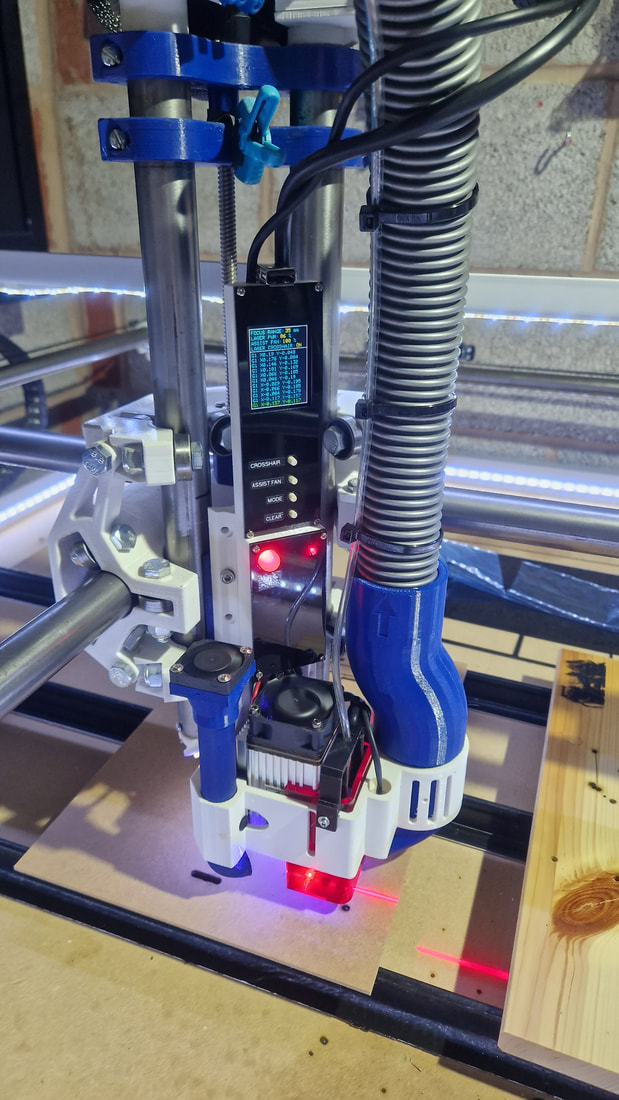
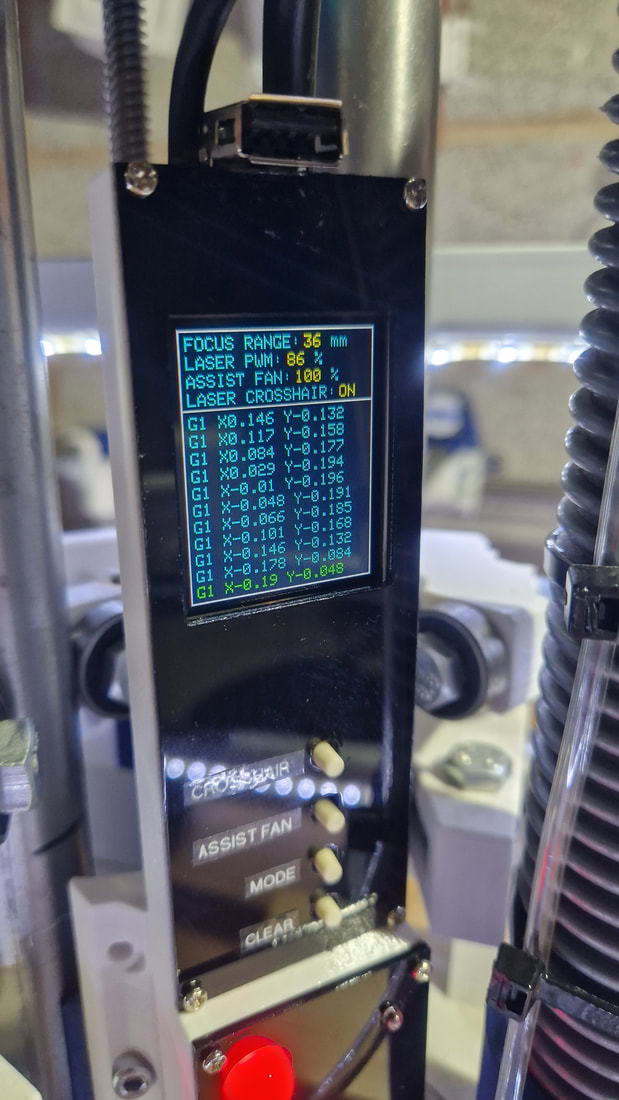
My new laser carriage will bolt to the Z frame and allow the laser to be mounted square to the cutting bed. The red laser guard can still be installed and adjusted. I have added a large (lightweight) tower to the rig that houses a Teensy 3.2. This will monitor various functions and drive a 1.8" TFT screen I found in my scrap parts bin. The frame also houses the laser connection block. Under the chassis there are a pair on 12mm line lasers. Two lasers set separately work better than a single cross laser, as this means the laser will stay correctly targeted no matter what height the laser is set at. There is also a new exhaust vacuum port for my extractor fan (height adjustable). On the opposite side, there is a small 5v assist fan that blows the smoke towards the extractor vent. In testing, this worked well. On the bottom of the rig is a VL6180X Time of Flight sensor. This reports back the distance in mm from the bottom of the laser to the cutting surface. This is displayed on the TFT screen. Under the screen there are 4 buttons.
|
|
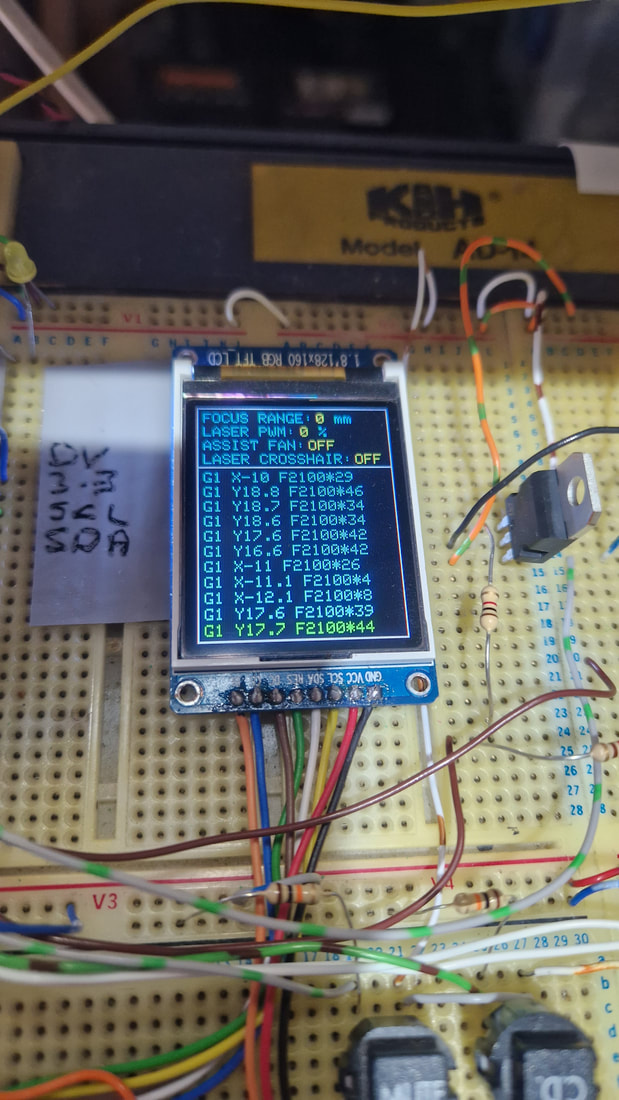
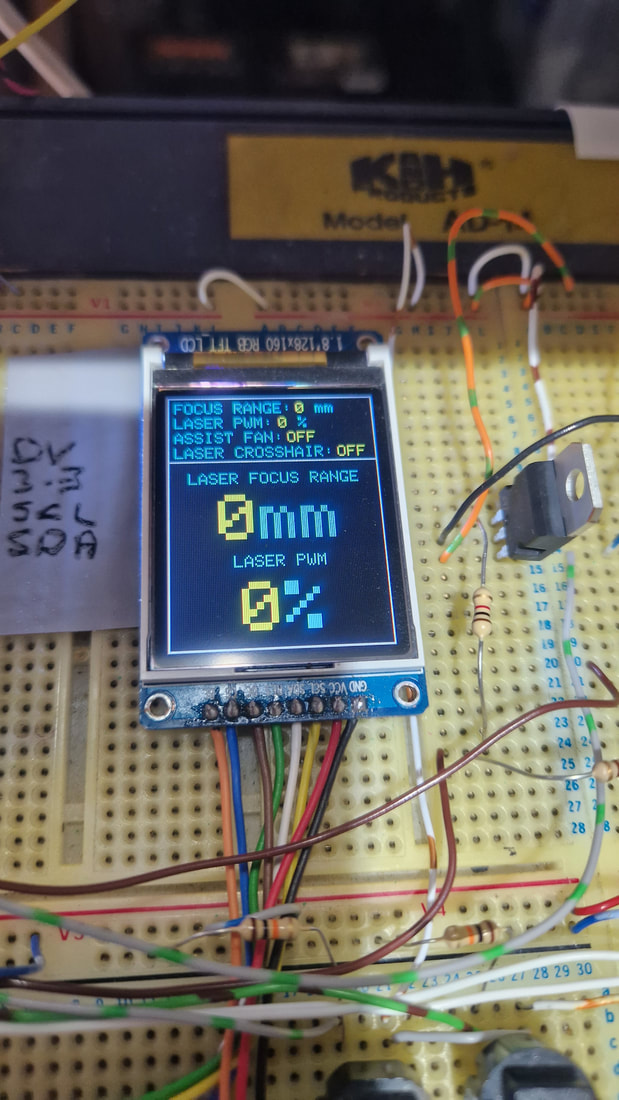
The TFT screen has basic information listed at the top of the screen:
Below this is a live, scrolling report of all arriving G-code for the laser. This took a little bit of fiddling, as the display is only 21 characters wide. Repetier host sends incrementing line number to the CNC machine with each command, this can waste around 5 characters at the start of each line once you are up in the 3 digit commands. Lightburn (for laser cutting) doesn't do this. So the code identifies these unwanted numbers by searching for the initial G or M command and using that as the start of the displayed line. The mode button switches the scrolling G-code information for enlarged reporting of the distance to the cutting surface and the PWM value being sent to the laser from the software. |
The wiring pretty much stayed as the breadboard. I did add an NPN transistor to control the TFT backlight, but the voltage was not enough to turn the transistor on fully and this lead to a dim screen. I simply shorted that out, as it wasn't essential and I didn't want to take the whole thing apart to remove that NPN. At a later date, I can re-install a better rated transistor or maybe a Mosfet.
I also added the ability to control the cross-hair lasers or the assist fan using G-code sent to the CNC.
M80 turns the cross-hair lasers on, M81 turns them off. M10 S### controls the speed of the assist fan 0-100%.
M355 toggles an output for lighting if I ever decide I want that on the base of the laser. I don't think I need it, so the pin is just left ready.
3d Print time....
Oh, a new Prusa MK3S+ printer.... bliss.
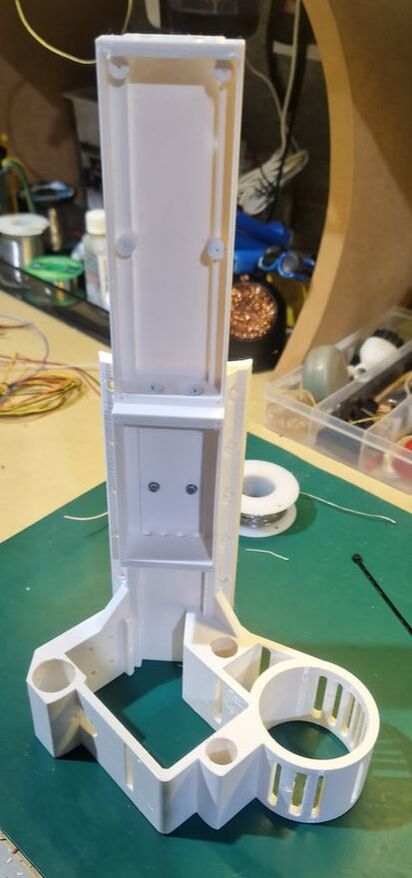
Lovely new 3d prints with no dramas. Makes life so much easier. Printed the main frame first and tried the laser for a fit. Yea, not quite right (but 99%). Had to Dremel a couple of small areas to get the perfect fit, and ideally, I would reprint as one of the lasers is about 3mm out of alignment with the actual laser. In practice, this doesn't matter at all, as you can rotate the lasers to align them, but it means the 2 lasers are not exactly 90 degrees apart. My OCD hates that. But, not wasting all that filament on such a small adjustment. Second issue... wow, I really needed a bigger enclosure. This was a tight fit. Trimmed the pins off the 3.2 and literally used every spare mm available. Everything else seems to fit fine. My only other adjustment was to 3d print an offset for the extractor fan pipe, as it was a bit too close to the CNC rail. The TOF sensor (Time of flight) was install and unbelievably worked quite well. The first one I bought from China and for £3 predictably, was a pile of s*&%. It only detected anything over 100mm and was appallingly inaccurate. Lesson learned there.... AliExpress is basically production line rejects from experience. So, bought one from a reputable store in the UK for £11 and we are away. Works sweet. I added code so that if you held the 'Mode' button at boot, it went into a small menu to allow you to set the actual laser distance from the target (add/deducts an offset value). It was all a little tight fitting, but that was a result of the fact that this has to fit within the footprint of the Z mount when the CNC is parked at Home (X =0, Y =0 ). But, it's in place and looking good. Used the laser to cut a couple of front panels from 2mm Acrylic and we can call this done. |
Just a word of warning...
Within 3 hrs of use, the lasers lens cracked. Seeing as it was bought on AliExpress..... NO CHANCE of getting that replaced.
This is the trouble with buying from China on AliExpress or Alibaba. You get crap 50% of the time. It's cheap for a reason.
I have ordered a replacement lens for $8 and we should be good to go, but even if you try to source a laser in the UK, chances are it will be from someone who just bought bulk off AliExpress anyway.
